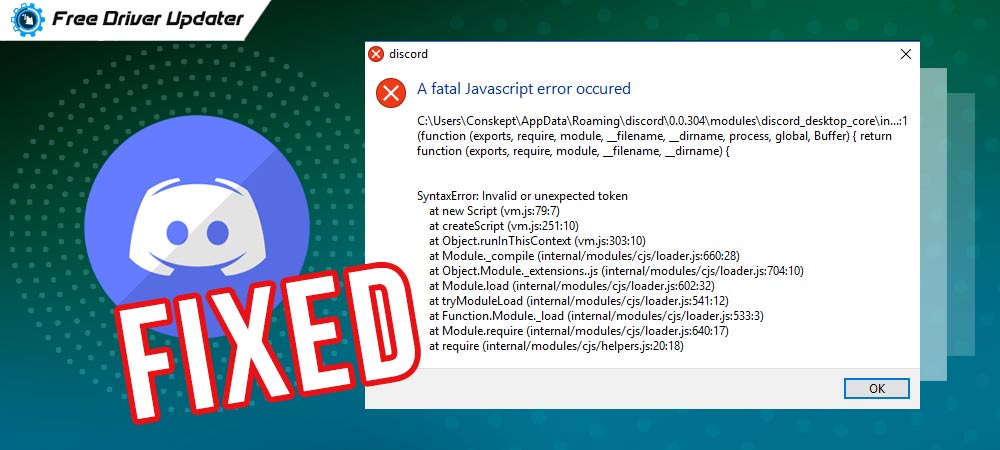
A fatal javascript error has occurred in Discord? If yes, then don’t panic. This is a step-by-step guide to help fix this annoying error.
Undoubtedly, Discord is a very must-to-have and popular application among gamers. Discord is used to chat with the co-players and share the gaming experience with the other gamers. But, what if, when such a useful program lags in responding accurately. It would be a hell-like experience.
And, there are a lot of users who are experiencing an unexpected Discord fatal javascript error lately. This error prevents the Discord from loading or opening at all. Hence, we have created this troubleshooting guide to help those users who are seeking solutions seriously.
Troubleshooting Tips to Fix Discord Fatal Javascript Error
If a fatal javascript error has occurred in Discord, then the solutions given below can help to fix the error. However, you do not need to try all of them, just work your way down until you find the one that suits your case. Now, without a further hustle, let’s get started!
Tip 1: Eradicate Temporary Discord Files
Discord tends to save temporary files in order to run the software properly on your PC. But, sometimes, due to these temporary files, a fatal javascript error has occurred in Discord. Hence, deleting these files might resolve the issue. Follow the steps shared below to do so:
Step 1: First of all, hit CTRL + SHIFT + Esc keyboard buttons together to invoke Task Manager.
Step 2: Now, find Discord in Task Manager and click on it to End Task.
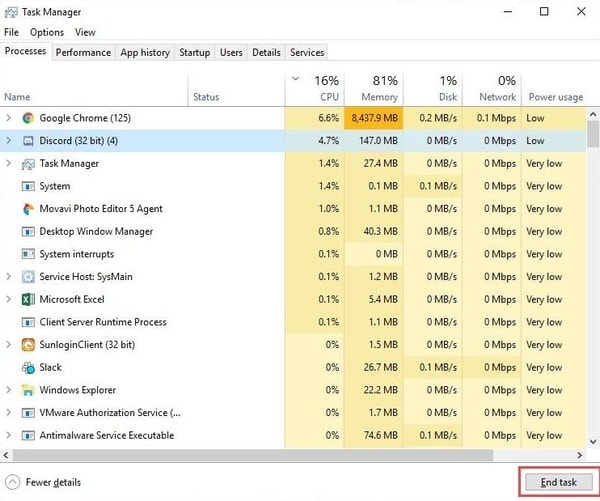
Step 3: After this, delete all the Discord’s associated files and start your PC again.
Now, install the Discord setup file again and check to see if this could fix Discord a fatal javascript error. If the error still persists, then move on to the solutions below.
Also Know: How to Fix Common Driver Problems in Windows 10, 8, 7
Tip 2: Modify the Startup Type of Quality Windows Audio Video Experience Service
If removing the temporary Discord files didn’t fix Discord javascript error, then you can try to modify the startup type of the Quality Windows Audio Video Experience service. Changing this service from manual to automatic might fix this Discord error. Below are the steps to do so:
Step 1: Invoke the Run Dialog box by hitting the Windows Logo + R keys at a time.
Step 2: And, enter services.msc inside the text field of the Run box. Then, click on the Ok button.
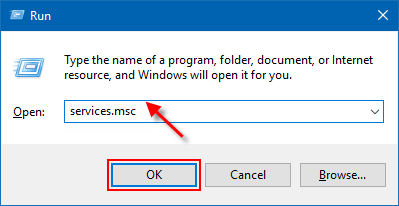
Step 3: This will take you to the Windows Services, wherein you need to locate the service named Quality Windows Audio Video Experience.
Step 4: Click right on this service to choose Properties.
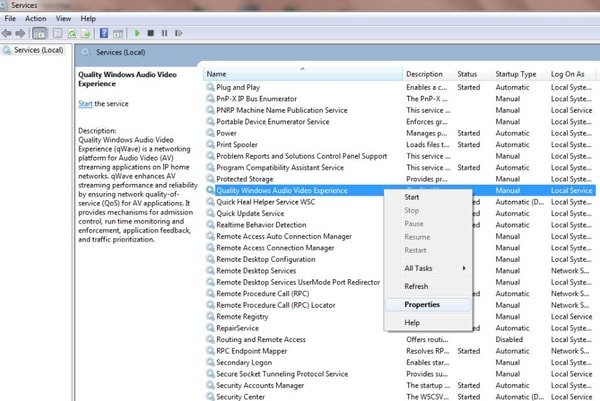
Step 5: Now, in the next window, if you see Service Status as Started, then stop it by clicking on the Stop option. Later, start it again by making a click on the Start option.
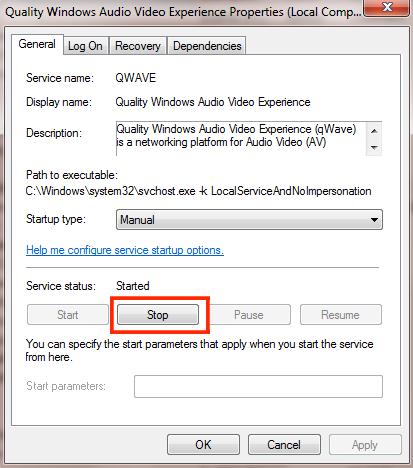
Step 6: Now, ensure that the Startup type must be set as Automatic. If it isn’t, then set it from manual to automatic.
Step 7: Lastly, apply the changes and click on the OK option.
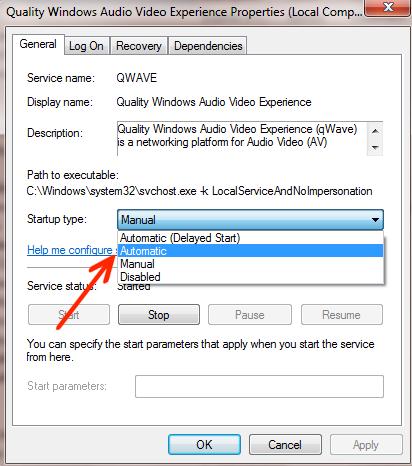
After modifying the startup type of service, check to see if the Discord error is fixed or not.
Also Read: How to Fix “System Thread Exception Not Handled” Error on Windows 10
Tip 3: Run Discord without Administrator Privileges
Many times Discord fatal javascript error occurs due to the admin privileges. If that is the case, then running Discord without admin privileges may work for you in order to resolve this inconvenience. Here is how to take the admin privileges away from Discord.
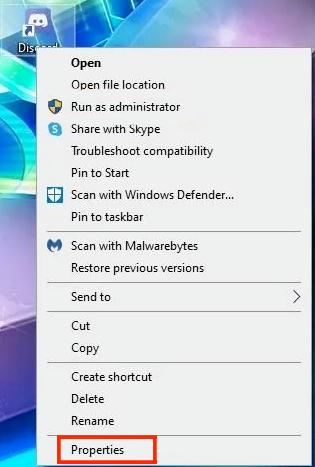
Step 1: On your desktop, click right on the Discord icon, and choose Properties from the context menu list.
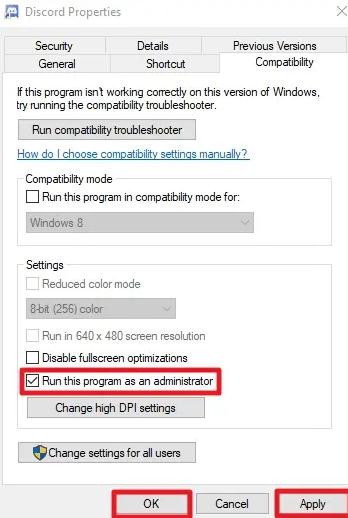
Step 2: In the next window, head to the Compatibility tab and unmark the box presented before “Run this program as an administrator”.
Step 3: Lastly, make a click on Apply and then Ok.
Step 4: Reboot your PC.
Now, if still, a fatal javascript error has occurred in Discord. If yes, then diagnose this with the other solution mentioned below.
Also Read: How To Fix “Bluetooth Peripheral Device Driver Not Found” Error [Solved]
Tip 4: Reinstall Discord
Unfortunately, if none of the fixes works for you, then as an ultimate solution try to uninstall and reinstall the Discord application. This diagnostic has worked for many users, so could work for you too. So, follow the steps shared below to uninstall and reinstall Discord.
Step 1: On your keyboard, press Windows Logo + R keys at a time to open the Run Dialog box.
Step 2: Then, type Control inside the box and hit the Enter key from your keyboard.
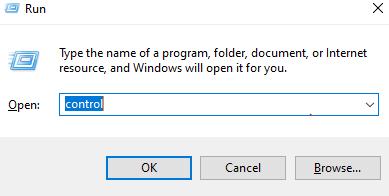
Step 3: Once the Control Panel opens, click on the Uninstall a Program option under the Programs section.
Step 4: After this, go through the entire list of installed programs and find out the Discord. Then, right-click on Discord and choose Uninstall.
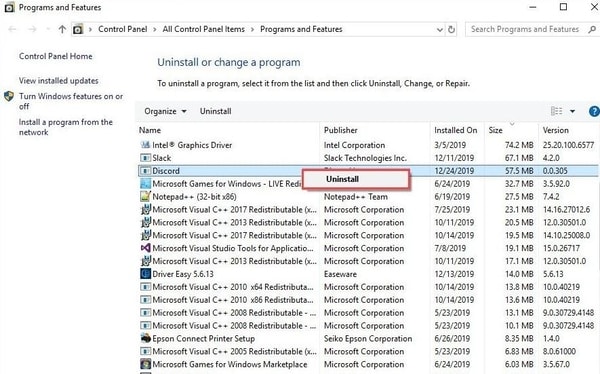
Step 5: Now, once the Discord application is uninstalled, open the Run Dialog box again by pressing the Windows logo + R keys.
Step 6: And, type %appdata% in the box and hit the Enter key.
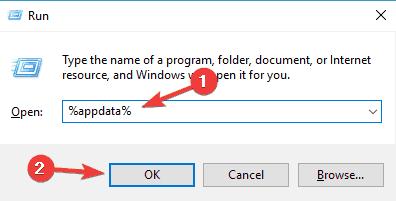
Step 7: In the next prompt, locate Discord and delete the respective folder.
Step 8: Once again open the Run Dialog box and type %localappdata%.
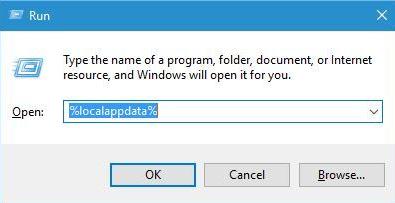
Step 9: Once more locate the Discord folder and remove it.
Step 10: After the successful deletion of files related to Discord, visit the official website of Discord to download and install it again.
Now, try to launch the Discord on your PC and check to see if the issues are fixed.
Bonus-Tip: Update All the Available Device Drivers (Recommended)
Outdated drivers are the major culprits behind the wrong behavior of any software and devices. Whereas, up-to-date and most genuine drivers ensure the speedy functioning of every task. Therefore, it is crucial to keep all the drivers updated always. The user has two options to update the outdated drivers i.e., Manually or Automatically.
Manual Method: If you have in-depth technical knowledge, especially about the drivers, then you are good to go with the manual approach. In this method, either you can use the official website of the manufacturer or a Windows in-built utility called Device Manager to perform the driver updates. Also, keep in mind that you must have enough time for this method as it takes quite long.
Automatic Method: Well, if you have no patience, time, and need technical expertise, then you can download and update the drivers automatically using the best driver updater tool.
The web market is flooded with tons of driver updater tools, but not all of them are good to try. But, out of all, we found Bit Driver Updater outshines its counterparts. Later, we tried and tested this software, and felt so amazed by knowing its effortless working abilities. And, the most exciting thing about this driver updater software is no big installation or any other processings to initiate the scanning.
We had installed the software and sat back, and within a few moments, it had updated all the outdated drivers without even hindering the ongoing work. Doesn’t everyone want “ease of work”? Yeah, of course, therefore, we would recommend you to use Bit Driver Updater for updating the drivers with full flexibility and ease.
Now, take a closer look at the step shared below to know how Bit Driver Updater works:
Step 1: First of all, download Bit Driver Updater from its official website. Alternatively, you can get Bit Driver Updater for free from the button shared below.
Step 2: Next, double-click on the downloaded file to run it. And then, follow the on-screen steps to get the software installed completely on your system.
Step 3: After this, open the Bit Driver Updater on your system and let it scan your PC for the outdated or faulty drivers that need to be updated.
Note: The software automatically starts the scanning when you open it. But, if you want to perform scanning manually, then you can do so, just by clicking on the Scan button from the left pane.
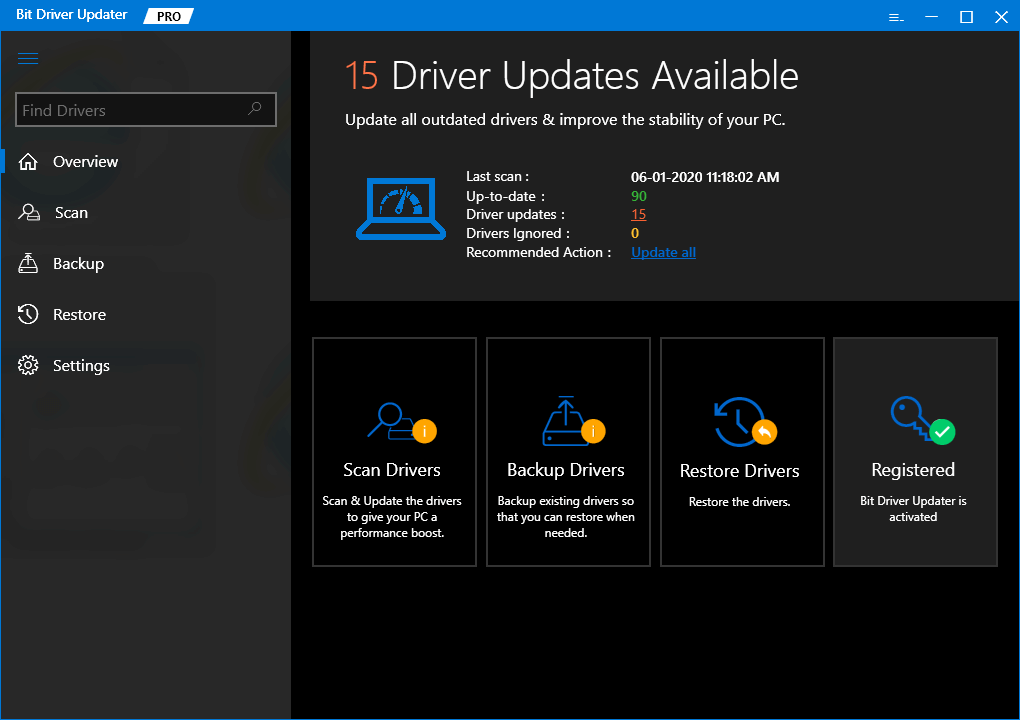
Step 4: Once the scanning is finished, the driver updater provides you with a detailed list of drivers that need an update.
Step 5: Go through the entire list and click on the Update All button to fix all the faulty drivers in one click.

That’s all! You need to follow in order to update drivers automatically. The driver updater is available in two models; free or pro version. However, you can also update drivers in the free version but one by one, plus, you will have limited access to its features. Hence, it is advisable to acquire the pro or full version of it.
Also Read: Download Blue Snowball Microphone Drivers for Windows 10, 8, 7 PC
Discord Fatal Javascript Error in Windows 10, 8, 7 PC: FIXED
So, these are some most common and beneficial solutions to fix Discord fatal error. Now, if a fatal javascript error has occurred in Discord and prevents you from proceeding further then you can try the troubleshooting tips shared in this informative document. Might be in some rare cases these solutions won’t work, but we assure you that at least, nine times out of ten, the solutions will fix the issue.
Let us know how you used our tested solutions and did they actually work for you? Also, drop your queries in the comments below, if you have any.
Additionally, do subscribe to our Newsletter for reading more troubleshooting articles to fix the other Discord errors. And, you can also get connected with us through Instagram, Facebook, Twitter, and Pinterest.


