Resolve the “System Thread Exception Not Handled” error with any of the fixes described in the document. Read on the entire write-up for in-depth understanding!
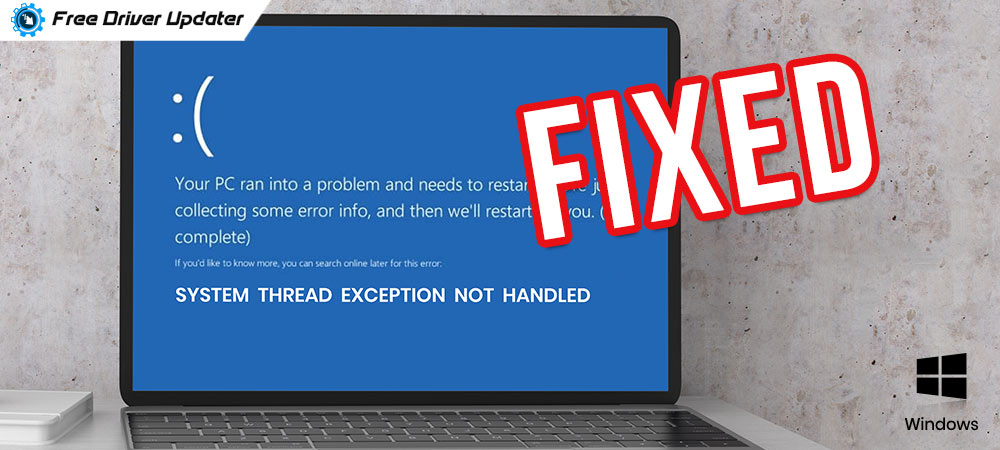
It is a comprehensive error among Windows 10 users. And, it can occur at any time during start-up or while performing any random operation. However, it can occur anytime but quite a few users reported the error arises at boot time.
The SYSTEM_THREAD_EXCEPTION_NOT_HANDLED is a general Windows 10 BSOD error that commonly occurs because of broken, missing, or outdated drivers. Another causes of this error are memory conflicts, system incompatibility, IRQ conflicts, and so on. But, you do not need to worry, you can fix this error quite easily & instantly. All you need to do is just go through the write-up till the end.
Solutions to Fix System Thread Exception Not Handled Error on Windows 10
To fix the System Thread Exception Not Handled on Windows 10, read the methods provided below.
Solution 1: Update, Roll Back, Uninstall Drivers
As we have mentioned above that incompatible or missing drivers are the major culprits behind the occurrence of this error. Hence, you need to make sure that all the drivers are up-to-date. But sometimes, updating the drivers isn’t enough to deal with the issues, in that case, you need to reinstall the drivers.
Plus, in many cases, new drivers aren’t able to resolve the issues, in that situation, you have to roll back to the previous drivers. If you don’t have an idea how to do that, then don’t worry, just stay focused, we have provided the steps for updating, reinstalling, and rolling back the drivers. So, read them below!
Talking about updating the drivers, then you can do so either manually or automatically. We suggest you do the task automatically via Bit Driver Updater. Because doing the task manually is a bit troublesome and tedious. Plus, it takes quite longer than usual. Whereas, with the help of Bit Driver Updater, you can perform the task in just nanoseconds.
Along with this, you can also resolve numerous other issues as well including system performance, frequent system failures, and many more. To update drivers via Bit Driver Updater, here are the steps you need to follow:
Step 1: Tap on the download button provided below to install the Bit Driver Updater on your PC.
Step 2: Then, invoke the utility program, and click on the Scan button presented in the left pane.
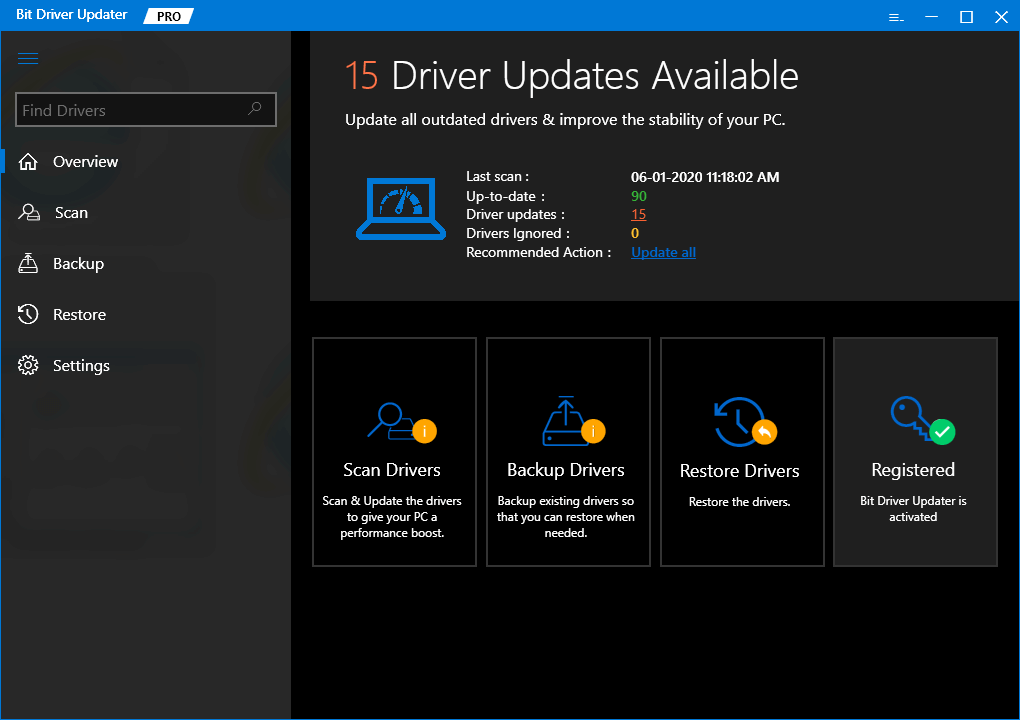
Step 3: Wait till the scanning is done. After that, check the list of the drivers which require an update.
Step 4: At last, click on the Update All option to run the driver update for all the faulty ones only within a click.

Also Read: How to Fix MTP USB Device Driver Failed Error on Windows 10/8/7
That’s it! You have successfully installed and updated the latest drivers on your system. Sounds extremely easy no! If updating the drivers doesn’t fix the issue, then try to roll back to the previous drivers. Here is how to do that:
Step 1: Press Windows + X keys on your keyboard, and choose the Device Manager from the list presented.
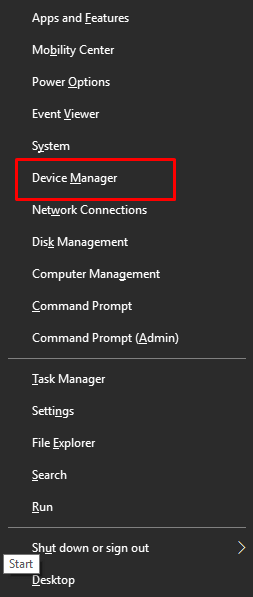
Step 2: Next, expand the category of the problematic driver by clicking double on it.
Step 3: Then, right-click a driver which causes the issue, and choose Properties.
Step 4: After this, switch to the Driver tab and click on the Roll Back Driver option.
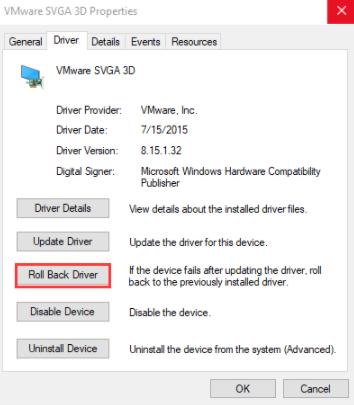
If in case, this also doesn’t work for you then the last option is just to reinstall the drivers. But, for reinstalling the drivers you need to uninstall the previous drivers first. Below are the steps to uninstall and then reinstall the drivers.
Step 1: Open Device Manager.
Step 2: Expand the category of the driver for which you want to uninstall the drivers.
Step 3: Furthermore, click right to the problematic driver and choose Uninstall as an option.
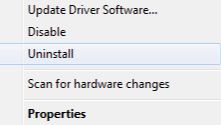
Step 4: If the confirmation box pop-ups, then click Yes.
Now, wait till the uninstallation finishes, and then reinstall the drivers. After ensuring the correct and compatible drivers, the system thread exception not handled on Windows 10 should get resolved. But, if it still persists, then move onto the next solutions.
Also Read: USB Device Not Recognized on Windows 10 [Fixed]
Solution 2: Repair System Files
There is a fair chance that Windows 10 system thread exception error may be caused by corrupted files that are stored in the system. Any person can repair these files by using DISM and SFC programs.
Here is a quick guide to run an SMC program:-
Step 1: Open Command Prompt as an administrator.
In Safe Mode:
- Type ” Command Prompt” in the windows search box.
- Right-click the Command Prompt icon and select to run as Administrator.
When the system can’t start/boot:
- Then go to Troubleshoot>Advanced Options>Command Prompt.
Step 2: Enter “SFC/scannow” and then press Enter key. Now, wait until the procedure completes.
SFC command is just used to replace damaged, lost, or changed files of the system. If Windows 10 system thread exception not handled error still does not get neutralized then you may adopt to run DISM command to restore your system files.
The guide to run the DISM command is:
Step 1: Open Command Prompt and run as administrator.
Step 2: Enter the following commands one after another:
exe/Online/Cleanup-Image/
Scanhealth
exe/Online/Cleanup-Image/
Restorehealth
Also Read: How to Update Drivers on Windows 10 for FREE | Update Device Drivers
Solution 3: Update Firmware
Another way to solve the System_Thread_Exception_Not_Handled error is by upgrading the firmware to the most recent version. It has the ability to enhance the overall system’s consistency and performance. If you can identify the accurate BIOS version, then you can also access this solution, it doesn’t make any sense whether the system can boot into Safe Mode or not. Here are the steps to update Firmware:
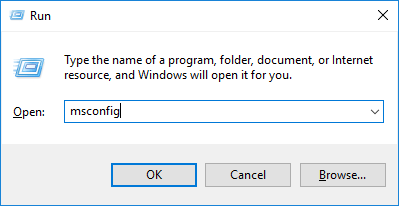
Step 1: On the Keyboard, hit the Win + R keys at a time to invoke the Run dialog box, then enter the MSConfig in the box and click the ok button.
Step 2: Switch to tools.
Step 3: Select System Information and then click on the Launch option.
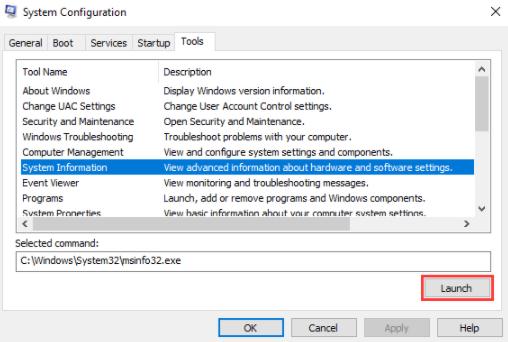
Step 4: Next, see the current BIOS version or date.
Step 5: After this, by visiting the manufacturer’s official website, download and install the appropriate latest BIOS version.
Step 6: Connect the USB holding the latest BIOS version and input BIOS to update the firmware.
That’s it, now you can easily update the firmware. But, do keep in mind to have the proper technical skills for upgrading the firmware as it is a more daunting task than it sounds. Updating firmware can also fix the IRQ conflicts by setting the IRQ in BIOS manually.
Solution 4: Reinstallation of Operating System
If none of the above solutions worked for you, then you have only one last option left and that is clean reinstallation of OS. Many users reported that they have fixed the System Thread Exception Not Handled error through this solution. For performing the proper reinstallation of OS, you must utilize the partition management software to recover or backup overall data. Then, you can perform the clean reinstallation of Windows 10 OS.
Also Read: Completely Best Free Driver Updater Software for Windows 10, 8, 7
System Thread Exception Not Handled Error on Windows 10 – FIXED
We hope after trying the above steps you would have not to encounter BSOD errors again. If you have any queries then please ask in the comments below. Plus, share your suggestions as well in the box below.
At last, don’t forget to subscribe to our Newsletter for reading more troubleshooting guides like this one. Plus, you can also connect with us on Facebook, Twitter, Pinterest, and Instagram.


