If you are aiming to have a computer that can perform faster, better, and smoother, then you must make it free from cached data. So, if you are wondering how to clear cache in Windows 10, then this blog is for you.
We will first of all inform you vividly about what is cached data and how it impacts the system. Next, we will take you through the steps of the methods by which you can clean the cached data and temp files of your system completely.
What do you understand by cache?
In simple words, cache is a hardware device or else a software component that is capable of storing data. So, Windows cache would refer to either the dedicated section of the primary memory of the Windows device or a separate storage device.
Now, what is meant by cached data?
So, the term cached data refers to the data that has been stored on the system as result of an earlier request or a copy of the existing data which is saved elsewhere in the computer.
The main reason for storing a cache is to respond to subsequent requests for the same data faster.
The location of storing Windows cache can vary as data from different sources can be saved to different locations via different paths. However, the most common path for storing cache data in Windows computer is C:\Wndows\Temp.
Also Read: How to Increase Upload Speed On Internet: A Step by Step Guide
How cached data impacts your computer?
As described earlier, the cached data stored on your computer plays an important role in helping apps, programs, and the OS perform certain requests and actions faster. For example, the computer can load web pages faster and do various other tasks quickly.
But there are plenty of drawbacks too due to the presence of cached data in your computer. They are as follows:
- They can sometimes make your system hang.
- Presence of cached data can make the webpages load slowly.
- It might lead to system crashes.
- It might cause the infamous BSOD (Windows 10 Blue Screen of Death) error.
Why does cache cause system problems?
Cache is beneficial for the computer, only when the system has enough RAM, storage space, hard disk space and high processing ability.
If your system is low on disk space, memory, storage space, and despite this, there is an accumulation of cached data in your computer, then it can make your Windows computer slow and cause it to hang or freeze.
The lack of disk space can be the potential cause behind the BSOD error. If the cached data, which is used by the OS is corrupt, then it can make the system crash.
So, now you see that the presence of cached data is unfavourable for your PC and it is advisable to clean it on a timely basis. If you are wondering how to clear cache in Windows 10 PC, then go through the below solutions.
Read More: How to Fix Common Driver Problems in Windows 10, 8, 7
Top 5 Solutions: How to Clear Cache in Windows 10
Below are the five best solutions to help clear cache in your Windows computer.
Solution 1: Remove Cache with Win Magician
If you want to know how to clear cache in Windows 10 with Win Magician, then follow the below steps. You just need to click the mouse twice to clean your cache with this app.
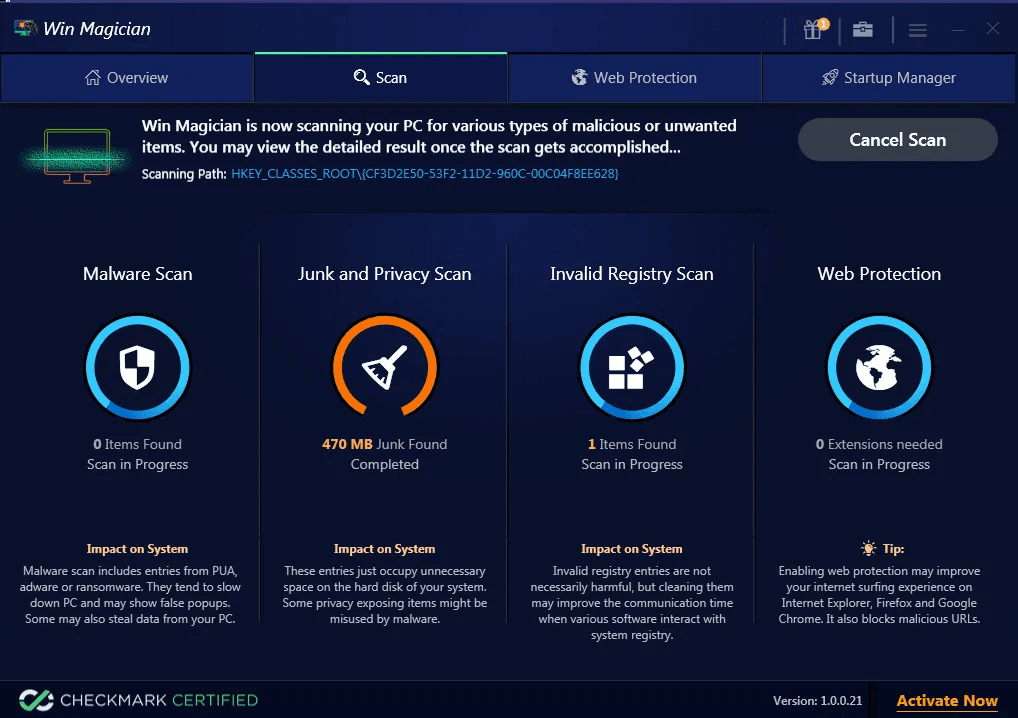
Image: Adware Guru
Step 1: Install and download Win Magician on our PC.
Step 2: Launch the Win Magician tool and then click on Junk and Privacy Scan.
Step 3: After the scan, the tool will display a list of temp files, memory dumps, cache data, privacy traces, etc.
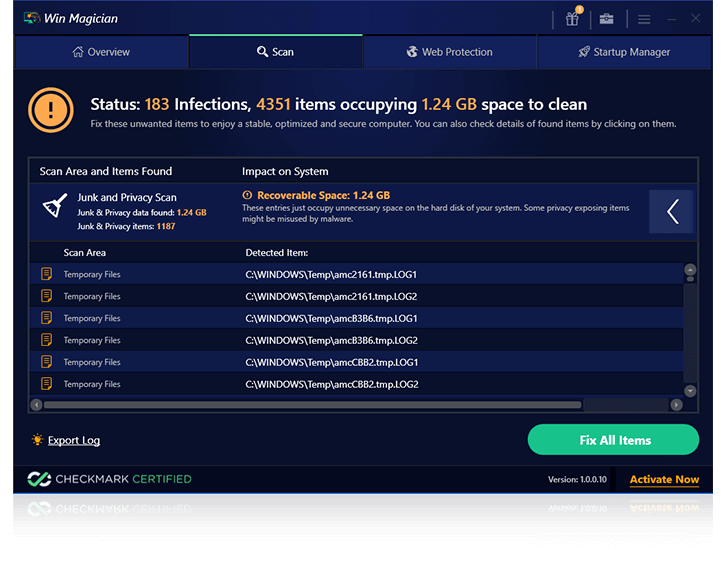
Image: Win Magician
Step 4. Click on the Fix All Items button to delete the unwanted data from your system.
This simple process can remove all the cached files from your Windows 10 computer within seconds.
Bonus Tip: Know How to Update Outdated Drivers on Windows 10, 8, 7
Solution 2: Use Settings App to Clean Temporary Files
Know how to clear cache memory in Windows 10 and remove the temporary files by following the below steps:
Step 1: From the Windows Start menu find and click on the Settings app.
Step 2: Tap on the System section.
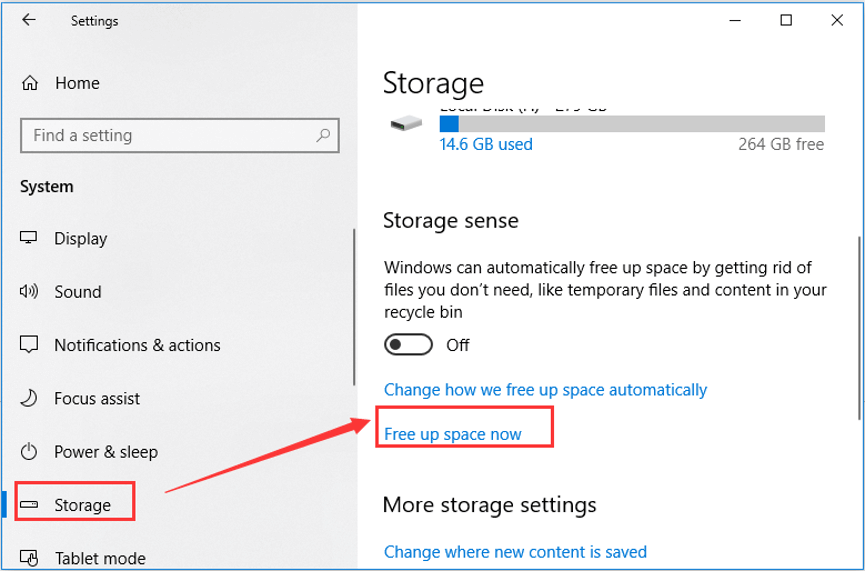
Step 3: Then, tap on the Storage option from the left panel.
Step 4: Further, tap on the Free up space now option on the main window.
Step 5: The system will take some time to complete the scanning process.
Step 6: Choose those files that you need to remove and then tap on the Remove files button.
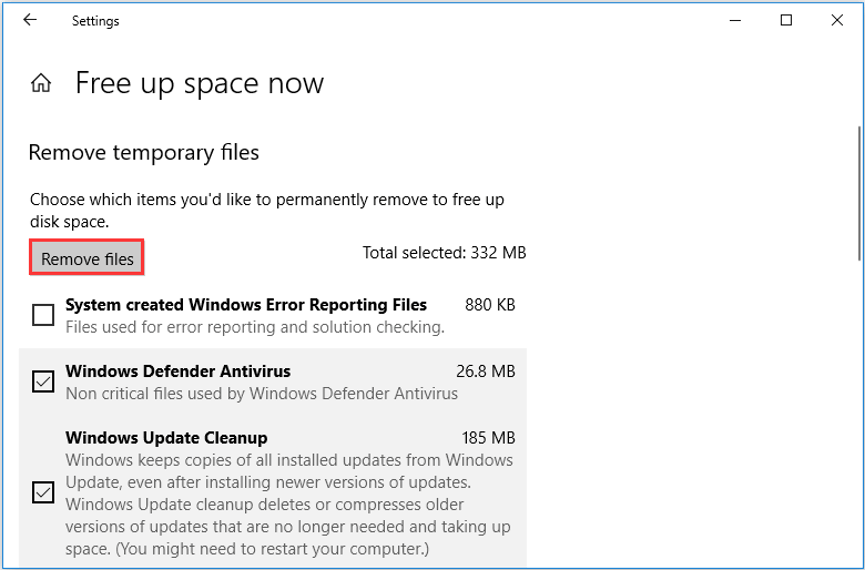
Image: Partition Wizard
Step 7: Wait till the cleaning process is completed.
This process should remove all the temporary files from your computer and would increase the space within your system disk.
Also Read: How to Update WiFi Drivers on Windows 10, 8, 7
Solution 3: Use Disk Cleanup to Remove Cached Data
Disk Cleanup utility, a built-in Microsoft Windows utility can also be used to clean cache or temporary files. If you want to know how to clear app cache in Windows 10, ensure you follow the below steps.
Step 1: To open the Run dialog box, hit the Windows key and R key on your keyboard.
Step 2: Write “cleanmgr.exe” and press the Enter key on your keyboard.
Step 3: Tap on the Clean up system files button (Ensure that the Temporary Files box is checked).
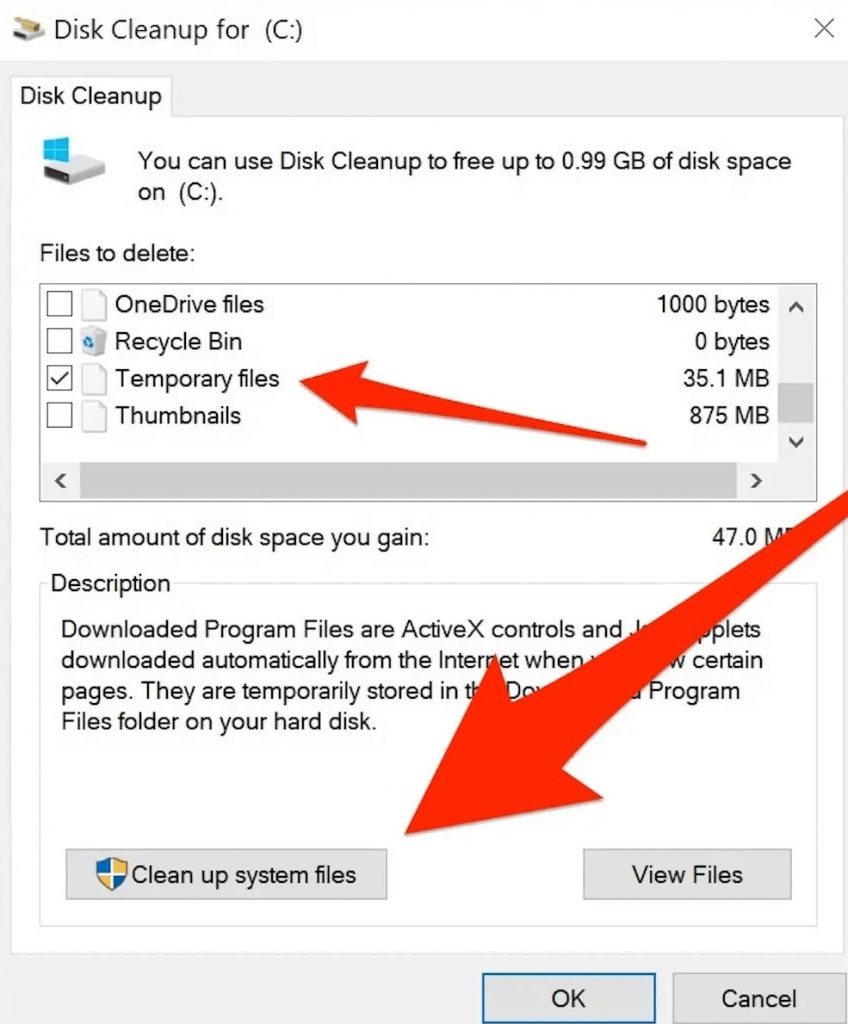
Image: Business Insider
Step 4: Click on the Yes option further.
Step 5: Tick all the appearing items and then click OK.
Step 6: Further, click on the Delete Files button.

Step 7: It takes some time to clean those files and you might have to wait till then.
This is how you can use Disk Cleanup to clear the cache from your Windows 10 computer.
Solution 4: Delete Windows Store Cache
When you try to download various apps, then Windows Store will create temporary files. Windows Store cache files can be corrupted many times and learning how to clear cache in Windows 10 can save you from many troubles.
Step 1: Type “wsreset.exe” in the Run dialog box and click on OK.
Step 2: The Command Prompt box appears without any text in it.
Step 3: Wait till the cached data is deleted in the background.
Step 4: Once the files are deleted the Command Prompt will disappear automatically.
Read More: Open Recently Closed Tab in Google Chrome Browser
Solution 5: Remove Browser Cache
While scrolling through the internet, you keep creating cached files. These files need to be deleted since over a period of time, they might slow down your system and browser. Learn how to clear cache in Windows 10 by using the below mentioned steps.
Step 1: Try clicking the Ctrl + Shift+ Delete keys together.
Step 2: Select “All time” from the time range section.
Step 3: Make sure you have checked the Cached images and files box.
Step 4: Click on the “Clear Data” button.
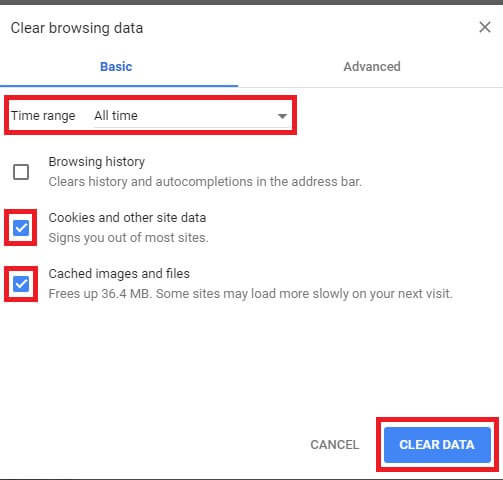
Step 5: The cache files would be removed soon after doing the above action.
Resolved: How to Clear Cache in Windows 10
Thus, this tutorial gave you a fair idea on how to clear cache in Windows 10. We gave five excellent solutions to remove the cache data and temp files from your Windows 10 computer effortlessly.
So, next time you feel your laptop or PC is running slow or the internet seems to be slow, then cleaning cache from the system and browser would be the first step that you can confidently take to resolve those issues as you can always take help of this blog.
Drop in your comments in the comments box below to let us know which method seemed to be the most easiest one to perform. Also, forward your questions to us as we would be happy to get back to you with solutions quickly.


