

If your NVIDIA Geforce Experience not working on Windows 10/11 PC, then this article will help you with some of the best solutions to get rid of this issue within minutes.
The GeForce Experience works like a Windows control panel, which gives gamers a way to change how their computer uses their graphics card. This app lets you change everything about your graphics and display settings in one place and allows you to set them as per your needs. Unfortunately, many gamers have reported that they are facing the NVIDIA Geforce Experience not opening error on their computer, which is impacting their gaming experience.
If you are one of the users who is troubled with this issue, then we would like to tell you that there are various reasons behind this issue. However, there is nothing to worry about, this article will provide you with some of the most efficient and effective techniques that you can implement in order to fix it. So without wasting any more time, let’s check out these approaches.
Methods To Fix NVIDIA Geforce Experience Not Working In Windows 10/11 PC
The approaches mentioned below will help you resolve the NVIDIA Geforce Experience not opening error with some directory steps.
Fix1: Restart The NVIDIA Services
For a smoother and better performance of the GeForce Experience app, it is required that its background services are running properly. If the service can’t start or can’t run, it means you will face the NVIDIA Geforce Experience not working problem. The best way to fix this is to turn off the service and then turn it back on. Follow these steps to get the GeForce Experience service back up and running:
- Search for the Control Panel utility in the Start menu’s search box.
- Change the Control Panel icon’s layout to Category from the View by option.
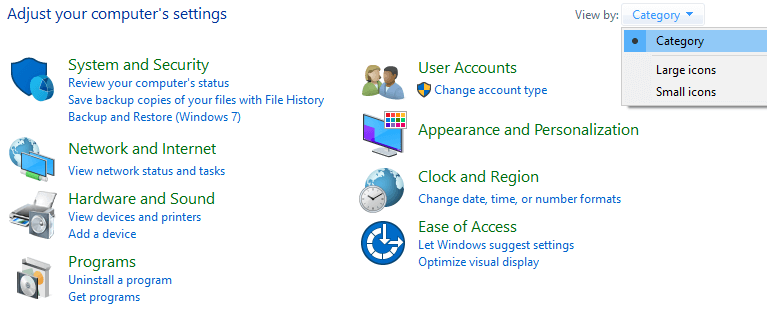
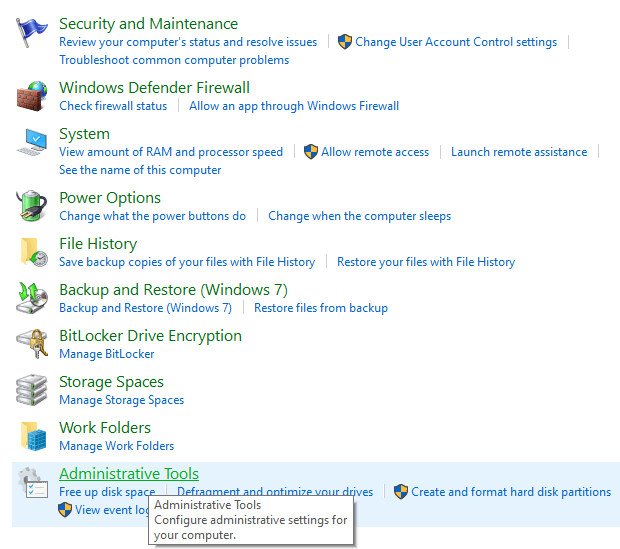
- Go with the System and Security option. Then, select Administrative Tools and it will open a new window of Windows-integrated tools.
- Double-click on the Services tool among the other options to open its separate window.
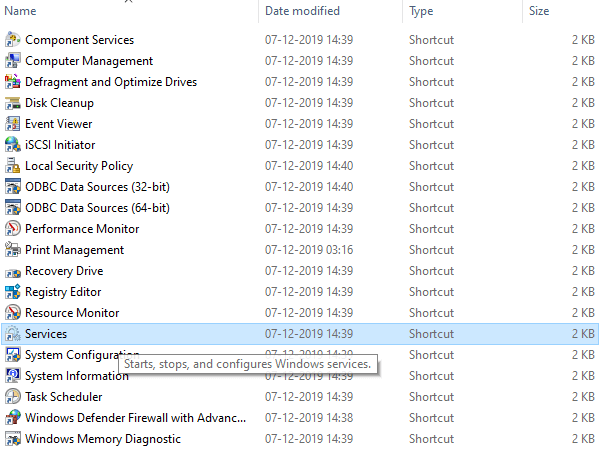
- Now, look for the NVIDIA GeForce Experience Service option by scrolling through the list given.
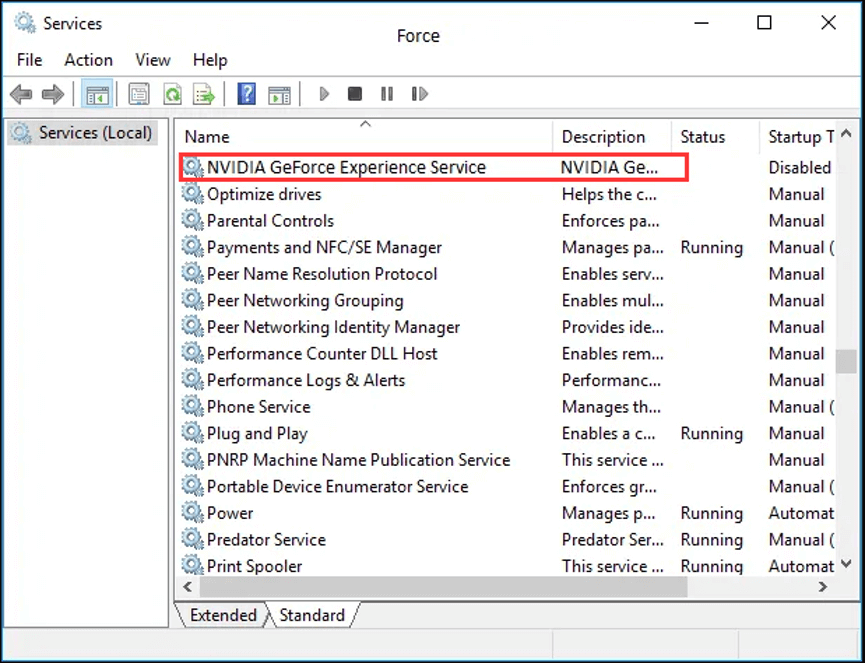
- Then, right-click on it and choose the Restart option from the context menu.
Give your computer some time to restart the service. After that, check if restarting the service helped you fix the NVIDIA Geforce Experience not working problem. If it doesn’t, update your graphics or display adapter driver to fix the issue.
Also Read: How to Fix Nvidia Graphics Cards Not Detected on Windows
Fix2: Update NVIDIA Graphics Driver Using Third-party Application
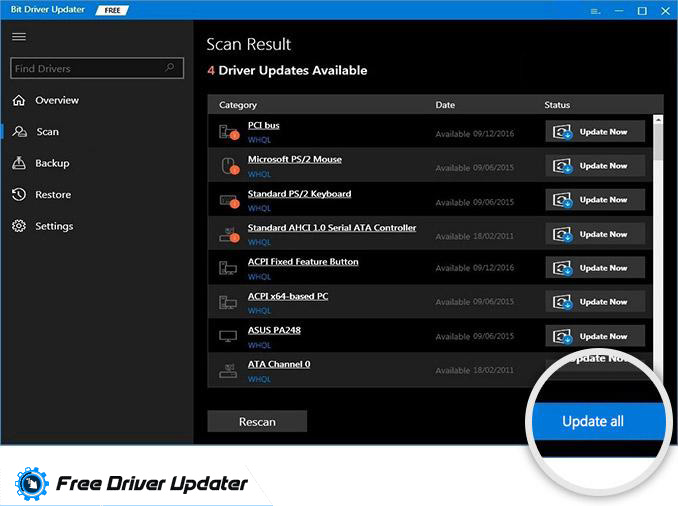
There are various ways to update your device drivers on a Windows computer. However, if you want to save your time and effort wasted on these manual methods, then we recommend you go with this automatic procedure. You should use a driver updater software like the Bit Driver Updater to update your graphics drivers and fix the problem easily.
The reason why we recommend this app is that it is one of the best and safest driver updaters for Windows devices. The tool is easy to use and provides real-time updates from the manufacturers’ websites. All the drivers that these program downloads are WHQL-certified. Moreover, you can always back up and restore the driver any time you want with this utility. Also, the tool uses an accelerated download engine, you don’t need to worry about time wastage.
Steps To Fix Geforce Experience Not Working Issue Using Bit Driver Updater
The steps shared below will provide you with a download link to get the latest version of the app. Then, they will guide you through the entire process.
- Get the latest and most compatible Bit Driver Updater version for your Windows device from the link below.

- Once you download the app on your computer, click on the package file and follow the instructions to install it properly.
- After that, launch the Bit Driver Updater and it will start scanning your computer to find if there are any outdated or corrupted drivers present.
- Now, a list of drivers will appear on the window that needs an update. Go with the Update All option to get all the drivers updated at the same time.
After finishing the driver update process, reboot the computer, and it will automatically replace the old drivers with the new ones. Now, check if performing this procedure helps in fixing the Geforce Experience not working issue. If it doesn’t, then you need to reinstall the application.
Also Read: How to update NVIDIA High Definition (HD) Audio Driver for Windows
Fix3: Reinstall NVIDIA Geforce Experience Software
If none of the above solutions work, you should try reinstalling GeForce Experience to get a new copy of the program on your computer. Implement the instructions mentioned below in order to reinstall the latest batch of the app and fix the Geforce Experience not working problem.
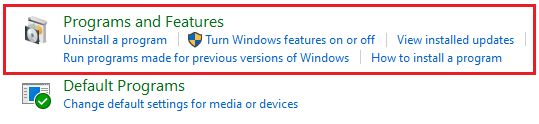
- Open the Control Panel utility by searching it in the taskbar.
- Change the window’s layout to Category by selecting it from the View by option.
- Now, go for the Programs option. And then, choose the Programs and Features button.
- A list of applications present on your Windows device will appear. Right-click on the NVIDIA Geforce Experience and select the Uninstall option from the context menu list.
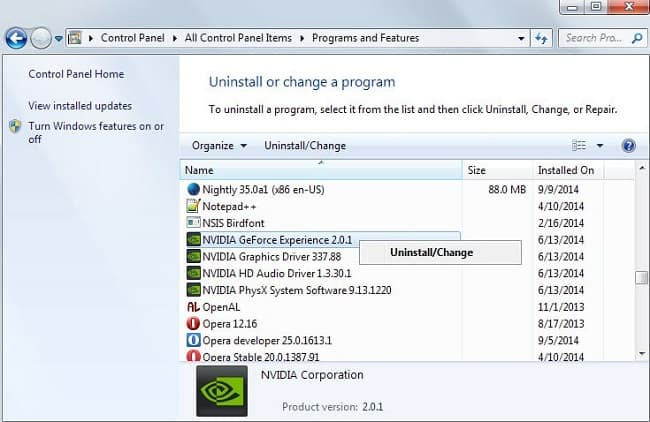
- A confirmation dialog box will appear, click on the Yes button to proceed further.
- Now, in order to reinstall the latest version of the Geforce Experience app, visit NVIDIA’s official website by clicking on the link below.
Click Here - This link will redirect you directly to the Geforce Experience download page. Click on the Download button to get the latest version on your PC.
- In order to install it successfully, open the package file. And then, follow the steps carefully displayed on the setup wizard window.
Once you are done with the installation process, launch the application and the Geforce Experience not working issue should be resolved by now.
Also Read: NVIDIA Control Panel Missing in Windows 11,10, 8, 7 [Solved]
Fixed: How To Solve Geforce Experience Not Working Problem On Windows 10/11 PC
If you follow our detailed guide on how to fix the NVIDIA Geforce Experience not opening issue, you’ll be able to use the graphics control panel properly. Also, if the issue still persists, contact the NVIDIA support team for professional assistance. Moreover, share your thoughts about this blog post in the comments section below.


