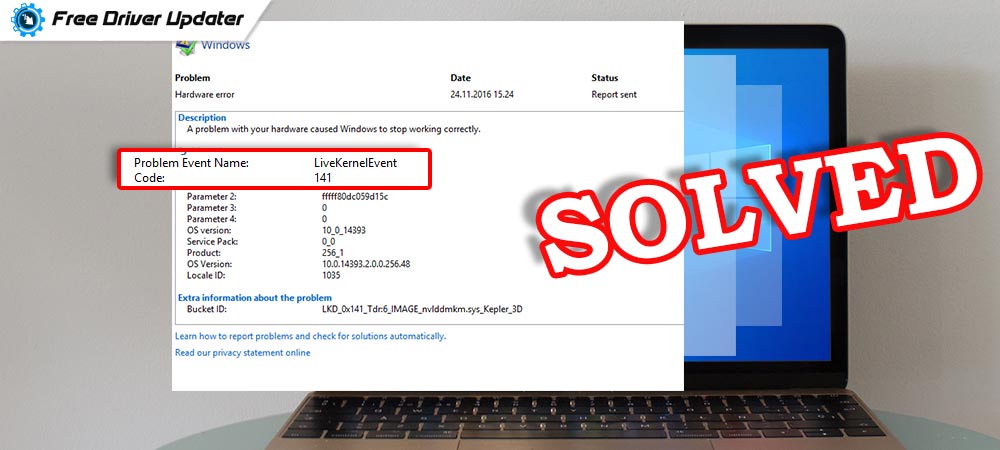
Getting LiveKernelEvent 141 hardware error? Don’t worry, the issue can be easily solved by applying the solutions explained in this article.
Usually, this hardware error is triggered by the failure of a computer component. But, it can also occur when your GPU drivers goes missing or become obsolete. Apart from this, many users reported that this error occurred while playing games like Warzone and more. Well, it is hard to find out what is exactly triggering this error, but it is not at all hard to fix. There are a few solutions on the internet that will help you get rid of this issue without any hassles. In this write-up, we are going to discuss them one by one.
Quick Solutions to Fix LiveKernelEvent 141 Hardware Error on Windows PC
Here, we are going to put together a few workable solutions that helped numerous Windows PC users who have complained about the same error. So, they might work for you as well. However, you do not need to utilize all of them, just make your way through the list until you get the one that resolved the issue for you.
Solution 1: Update your GPU Driver
GPU is crucial to your PC performance, especially when you are playing a game. Out of date, faulty, or corrupted graphics drivers can be a prime reason why you are experiencing LiveKernelEvent 141 error. So, before trying anything complicated, just be sure that your graphics card drivers are up to date with their latest versions.
Below are two ways to update GPU drivers: manually or automatically.
Manual Driver Update: Graphics card manufacturers keep on releasing the new drivers. So, you can visit the official website of your GPU manufacturers and search for the correct drivers as per your Windows operating system version. But, before trying this method, just ensure you have enough time, patience, and special computer skills.
Automatic Driver Update: If you do not have time, patience, or required technical skills to update drivers manually, then you can use Bit Driver Updater to perform the same task automatically. Bit Driver Updater is a globally recognized driver updater utility that automatically detects your system and searches the most suitable drivers for it. Not only that, but the software also speeds up the overall PC performance by erasing the PC junk.
In order to update drivers with Bit Driver Updater, follow the steps below:
Step 1: Try Bit Driver Updater for free from the button provided below.
Step 2: Run the driver updating program on your PC and click on Scan.
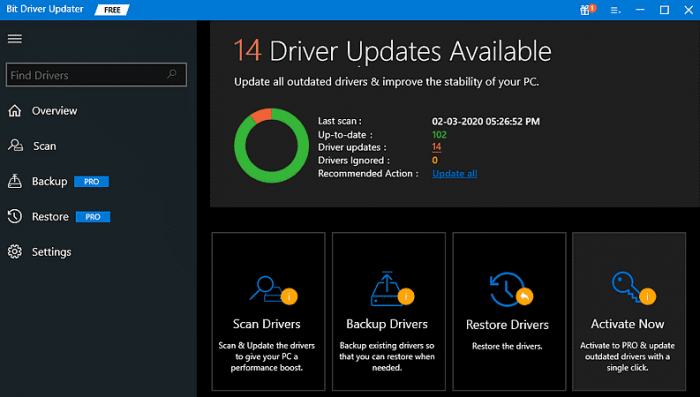
Step 3: Check the scan results and navigate to the outdated graphics drivers. Later click on the Update Now button beside the driver. Else, you can also click on the Update All button. This will update all outdated drivers within a single click of the mouse.
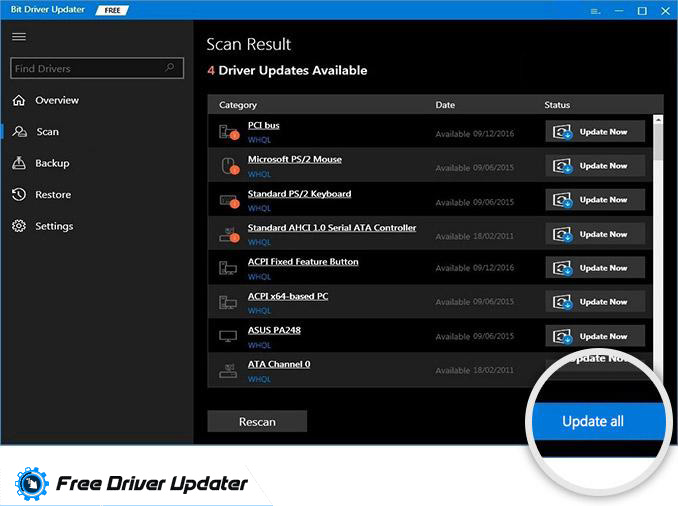
However, this requires the Pro version. So, you’ll be prompted to upgrade to the pro version. With the pro version, you also get full technical support and 60-days complete money-back guarantee.
After updating the GPU drivers, check to see if the LiveKernelEvent 141 hardware error is fixed. If not, then move on to the next solutions.
Also Read: How to Fix Critical Service Failed Error in Windows 10
Solution 2: Repair Faulty or Corrupted System Files
By repairing the corrupted system files, you can easily fix LiveKernelEvent 141 hardware error. To perform this task more precisely, you can use any trusted third-party Windows repairing tool like Reimage. Follow the simple steps to do so:
Step 1: First of all, download and install Reimage on your PC.
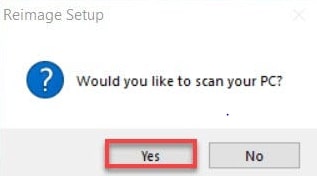
Step 2: After that, run it on your PC and click on YES to perform a free scan of your computer.
Step 3: Next, wait until the tool completes the scanning process. Once it’s done, then you will see a comprehensive report of all the problems on your system.
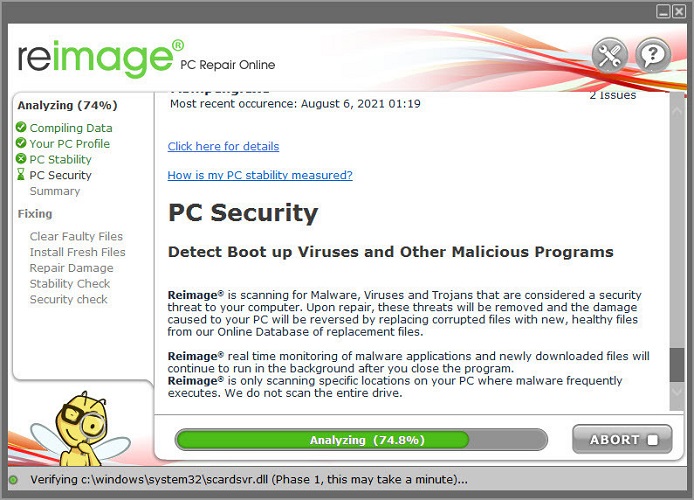
Step 4: Now, in order to resolve them automatically you need to click on START REPAIR. However, to do so, you need to purchase the full version of Reimage tool (it also comes with a 60-days complete money-back guarantee).
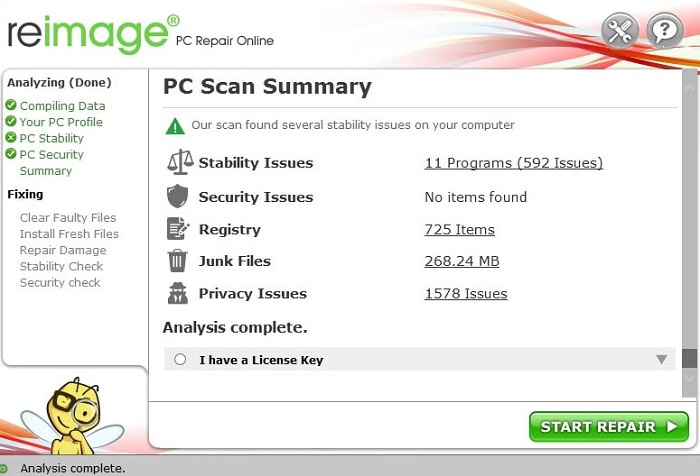
After repairing all the broken or corrupted system files, check to see if your PC is running smoother and faster. Try other tactics in case the error persists.
Also Read: How to Fix Error Code 0x800F081F in Windows 10 [Complete Guide]
Solution 3: Install Latest System Updates
Buggy or outdated Windows OS version is also responsible for LiveKernelEvent 141 hardware error. To resolve the issue, you need to check for the Windows Updates and download the available updates. Below are the steps to do so quickly:
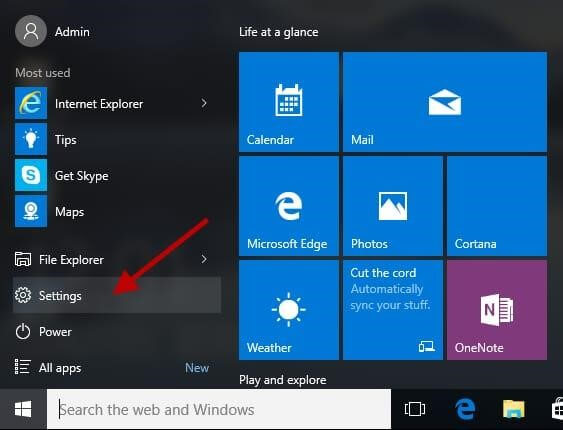
Step 1: Launch Windows Settings from the Start menu as shown below.
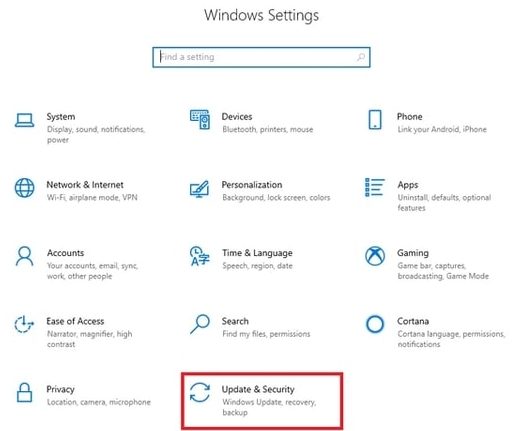
Step 2: After that, click on Update & Security to proceed.
Step 3: Next, choose Windows Update from the left panel.
Step 4: Lastly, click on Check For Updates.
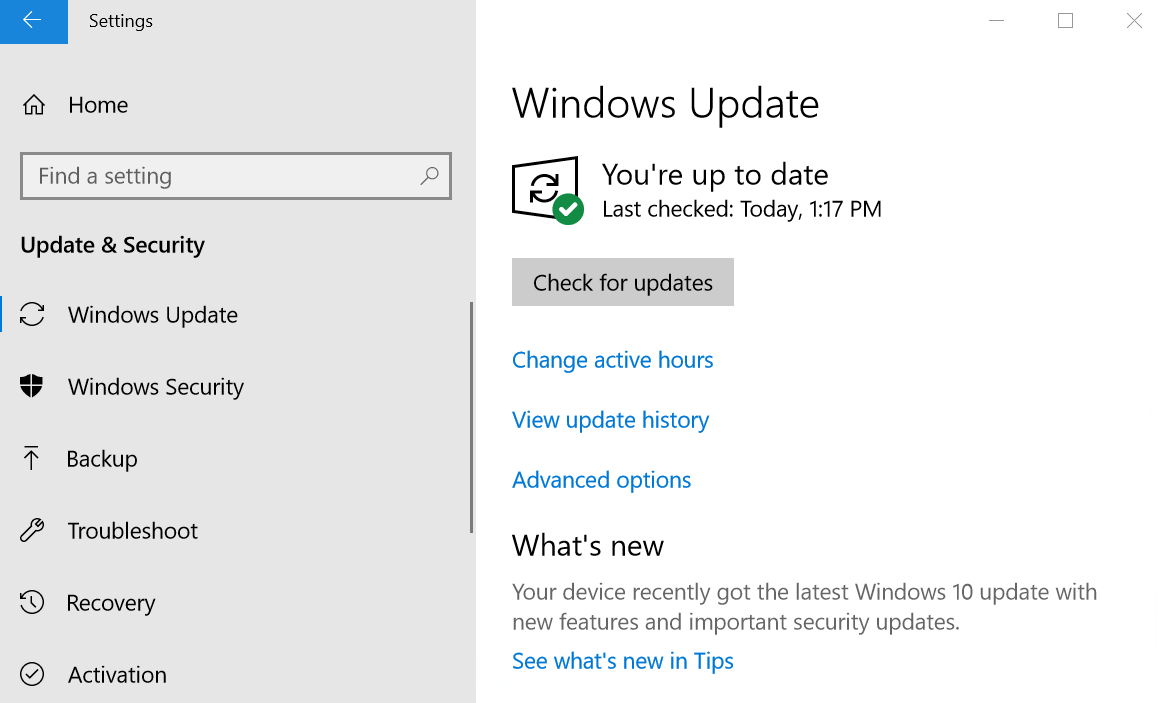
Now, let Windows find the latest updates. If there are any available system updates, then Windows will automatically download and install them. Once the process is completed, you will need to start your PC again in order to save the recent changes. Later, try to test the issue. If the error still persists, then move on to the next solution.
Also Read: How to Fix Broadcom BCM20702A0 Driver Error on Windows 10 [Solved]
Solution 4: Perform a Disk Check
A hard disk is a crucial computer component. If it doesn’t work properly as expected, you may experience different problems or errors. LiveKernelEvent 141 hardware error is one of them. So, if none of the above-discussed solutions helped you resolve this error. Then, consider running a deep disk check as a last resort. Here is how to do that:
Step 1: To get started, you need to launch Command Prompt utility as an administrator.
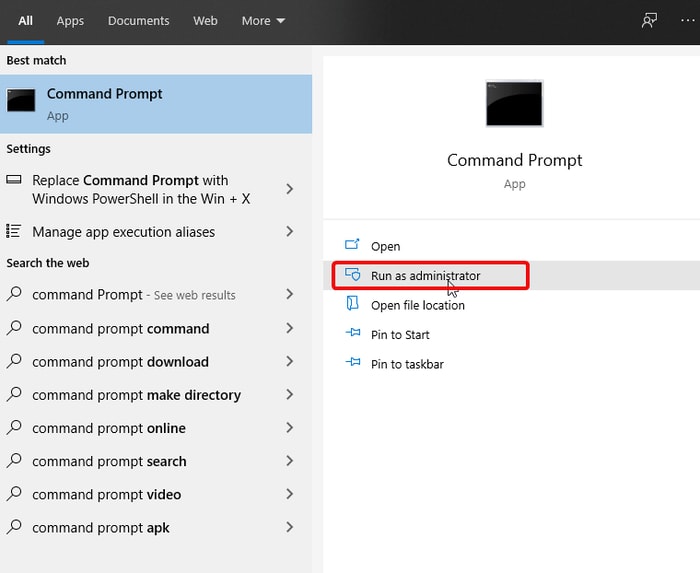
Step 2: Then, type chkdsk C: /f /r /x in the command prompt (admin) window. Afterward, hit the Enter key from your keyboard to proceed.
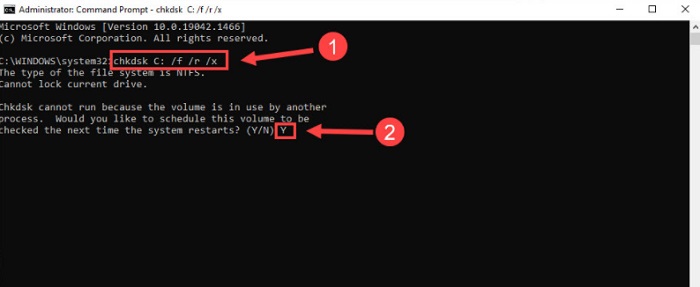
Note: If the process doesn’t begin as expected after writing the command and you see a pop-up window as below, then type Y in the command prompt and press the Enter key.
Step 3: Now, be patient and wait for the process to be completed.
The above procedure will automatically scan the disk drive and also repair the recognized errors. Once everything is done, then reboot your computer to apply the recent changes. Hopefully, this error should get fixed.
Also Read: How to Fix Faulty Hardware Corrupted Page on Windows 10,8,7 [Solved]
LiveKernelEvent 141 Hardware Error on Windows PC: DONE
So, that was all about how to fix LiveKernelEvent 141 error on Windows 10, 8, 7 PC. We hope now this annoying error won’t bother you anymore. Please let us know in the comments if you have any queries or better recommendations to bypass this inconvenience.
Additionally, if you liked the above information helpful, then do subscribe to our Newsletter for more useful guides. Plus, follow us on Facebook, Twitter, Instagram, and Pinterest for quicker updates.


