

“What does the Windows Modules Installer Worker Do?”
Windows modules installer worker is a program that finds different Windows updates and also helps in installing the programs into your system. This Windows modules installer worker runs on the back end automatically as the updates keep happening to your system.
If you have got questions like “what is Windows modules installer worker” or do you want to know more about “why is Windows installer not working,” then let us find out more about it.
Sometimes, this Windows modules installer worker might not be responsive enough and it is then that the Windows modules installer worker consumes the maximum resources from your CPU. So, there are several ways to fix this problem.
Before you try fixing up this issue, ensure your Windows OS is running the Scheduled Automatic Maintenance Task. Wait for a while, if it is running and then go to the Settings. Click the All Control Panel Items, choose the Security and Maintenance option and then check on your Automatic Maintenance Process.
Even when your Windows Update is on the run, you might even then encounter a high CPU and you need to give it some time. Find a way to scan your system completely using a suitable malware and anti-virus also.
How Can the Windows Modules Installer Worker High CPU be Fixed?
There are mainly three ways in which you can fix the Windows Modules Installer Worker High CPU.
1) Cease the Windows Update Service and Then Disable It
2) Alter the Settings for Your Internet Services
3) Fix Up the TiWorker.exe File
Let us find out more about “how to fix the Windows modules installer worker high CPU usage error,” using the above methods.
1) Cease the Use of Windows Update Service and Then Disable It:
If you uninstall or force stop the Windows Update service that runs on the backend of your device to check and install new Windows updates, the Windows module installer worker process would then be not using a lot of your system’s memory.
Here is how you can force stop and incapacitate the Windows Update Service.
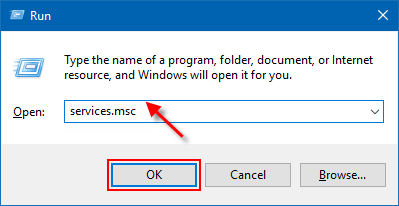
- Tap the Windows logo key and R together to bring up the Run box.
- Type services.msc in the Run box and then check on the OK button.
- The services Windows would reappear again so double click on it.
- Select disable from the drop-down menu appearing for ‘Startup type.’
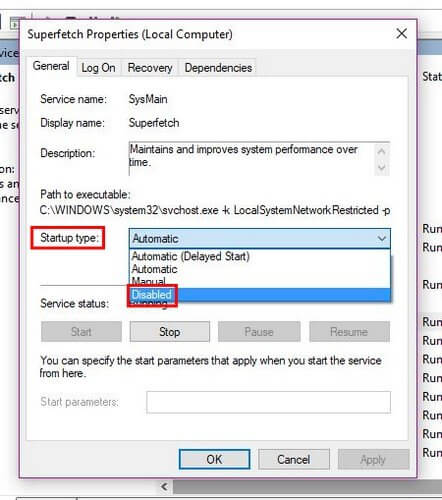
- Click Stop and then click on Apply and further click on the ‘Okay’ button.
Also Read: Best Free Driver Updater Software For Windows 10, 8, 7
2) Alter the Settings For Your Internet Services
Another different way to stop the Window Automatic Update on your system is to convert your internet services into a metered connection that can help you monitor your internet usage for the Windows module installer worker. Now again rises two circumstances:
a) You are on a Wi-Fi Network
b) You are Using an Ethernet Network Device
a. You are on a Wi-Fi Network:
Now, if you are using a Wi-Fi network then follow the below steps to stop the Windows automatic update on your computer system.
- Click on Start and then Settings, then Network and Internet and finally on Wi-Fi.
- Check on the Advanced Options button.
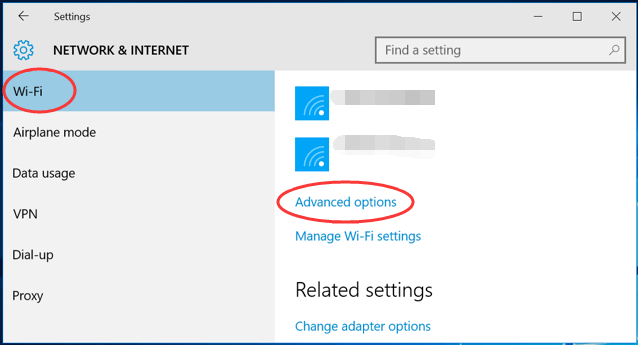
- Slide the switch on beside the metered connection button.
This should take care of your problems. You must try to find out if the problem exists for a larger period of time.
b. You are Using an Ethernet Network Device:
Let us now find out more about the next circumstance wherein you are using the Ethernet networking system:
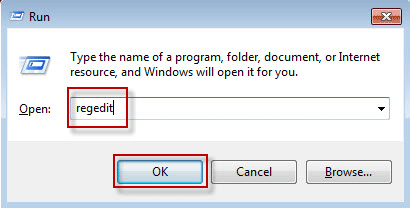
- Click the Windows logo key and R to bring up the Run box.
- Now, type ‘Regedit’ and then click on the OK button.
- Click on the Yes button when you are prompted to do so by the User Account Control.
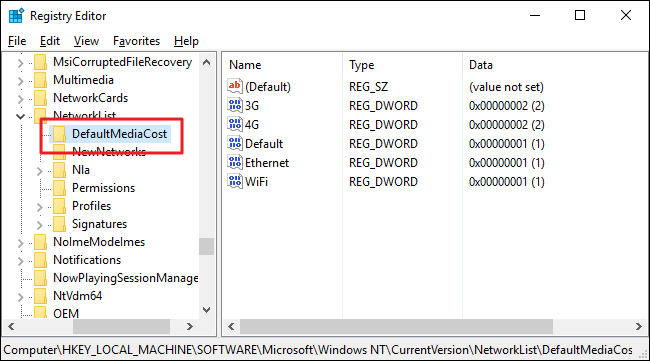
- Now, on your open Window, type: HKEY_LOCAL_MACHINE>SOFTWARE>Microsoft>Windows NT> CurrentVersion> NetworkList>DefaultMediaCost. Right Click on DefaultMediaCost and check on Permissions.
- Check on Add and then punch in your User Name. Enter the object names to check it and then click on the Check Names button.
- Finally click on the “Okay” button.
- Check on the User you have just added and then check on the Allow tab for complete control. Finally click on the OK button.
- Double click on Ethernet. Change its value data to 2 and click on the Ok button. Close the Regedit Editor Window and finally reboot the computer again.
Now this should be able to bring down the High CPU usage by Windows module Installer Worker.
Also Know: DNS Server Not Responding on Windows: How to Fix It?
3) Fix TiWorker.exe
This file TiWorker.exe is actually constructed into the Windows Update system and there is a way in which you can fix TiWorker.exe. When there is a high CPU occurrence due to the WMI error for your Window Modules Installer Worker, follow the below steps to get rid of the issue using the TiWorker.exe.
- Use the Window Search Box and type Troubleshoot. Click on the correct option.

- If there is an older version of Windows that you are using, go to the Control Panel and then search for troubleshooting.
- ‘View All’ for the new Windows on the left side of the Window and click on proceed to the next step button.
- Locate System Maintenance and click on it.
- Restart the system after waiting for some seconds.
Also Read: How to Fix “No Audio Output Device is Installed” Issue in Windows 10
Conclusion:
The above given ways are some of the simplest and the easiest ways to fix your high CPU usage by the Windows Modules Installer Worker and are quite effective ways and solutions. However, even after doing all of this, if you are still not able to fix it up, then you might have to reconsider changing the hard drive panel.
Frequently Ask Question About Windows Modules Installer Worker:
1. Why is the Windows Installer Not Functioning?
When the Windows installer doesn’t work properly then you need to start it again in the following way:
- Open the Run dialog box and type the below input message followed by pressing Enter: MSIExec
- If the Windows installer windows opens up and shows that everything is alright, then it indicates that there is no problem.
- However, if it doesn’t respond then start it manually by going to Taskbar and switch to Serves.
- Find msiserver and start it.
2. Can You Stop Windows Modules Installer Worker?
If it’s causing high CPU usage, then you can easily disable it. To do this, you can open the Task Manager window and End Task from there.
Once you restart the system, you may find the CPU usage to decrease but it might not stay so in the long run.


