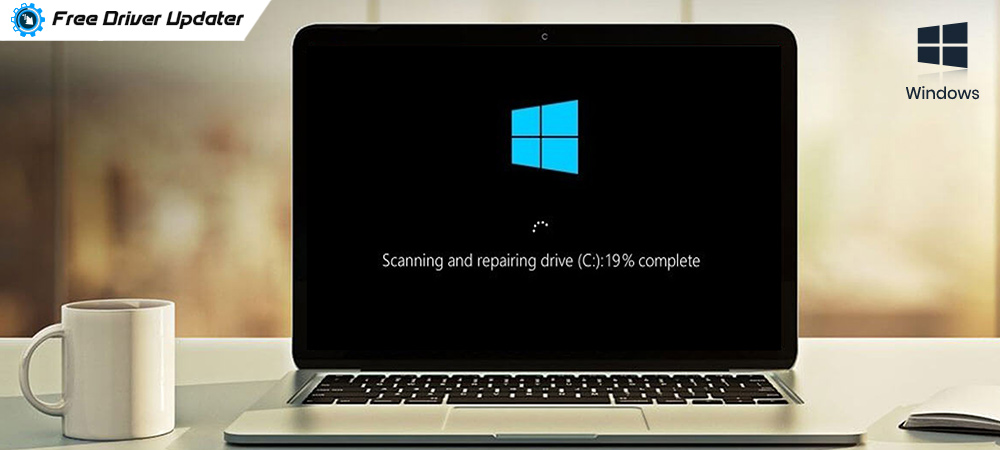
Amongst the many errors of Windows 10, “Scanning and repairing drive stuck error” is one common issue that usually shows up on system startup. It typically means that whenever you are trying to turn on your device, the booting process gets stuck permanently or takes hours to complete.
The entire situation can get highly frustrating when you frequently encounter the “Windows 10 scanning and repairing drive stuck” error. The problem can be fixed easily and that is exactly what we are going to discuss in the blog. If you are amongst those unfortunate users who are facing repair drive issues, then stay tuned for easy solutions and fixes.
Reasons Behind ‘Windows 10 Scanning & Repairing Drive Stuck’ Issue
Here are some reasons why you are facing Windows scanning and repairing errors while booting your PC.
- Improper system shutdown. This involves a force shutdown or shutdown due to power failure.
- Due to sudden shutdown, the data stored on RAM may get in bad shape and can even lead to complete damage to the hard-disk.
- In addition to this if your device drivers are not configured properly, it may also result in repairing drive stuck error on your Windows PC.
So, if you are in a habit of forcefully shutting down your PC, we recommend you change your habits on an immediate basis to resolve scan and repair Drive issues.
Simple Methods to Fix Scanning and Repairing Drive Stuck Error on Windows 10 PC
In the below section we will discuss some useful methods to resolve Windows 10 scanning and repairing drive stuck problems. However, before we move ahead we recommend you backup your files and other important data to avoid any data loss.
Read More: How to Fix Windows Error Code 1 in Windows [Solved]
Method 1: Use Windows Error Checking Tool to fix Windows Scanning & Repairing Error
Windows error-checking tool provides an easy way to scan your device and repair all possible issues. Here is how you can use it.
- Launch Taskbar on your computer.
- Open File Explorer and then select “This PC” from the left pane.
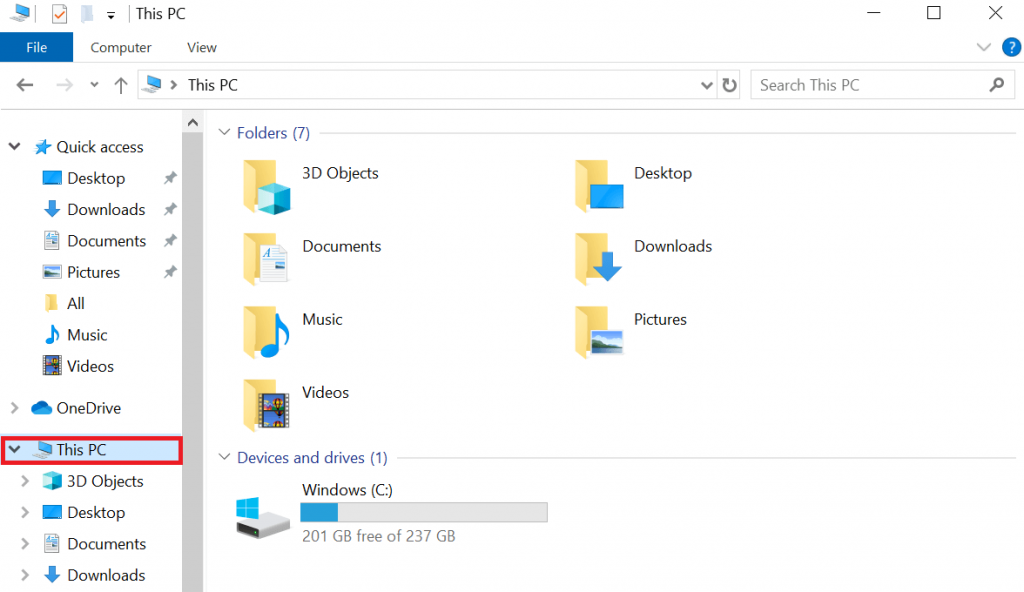
- Expand Devices and drives option. Now right click on the drive that Windows is currently scanning and repairing.

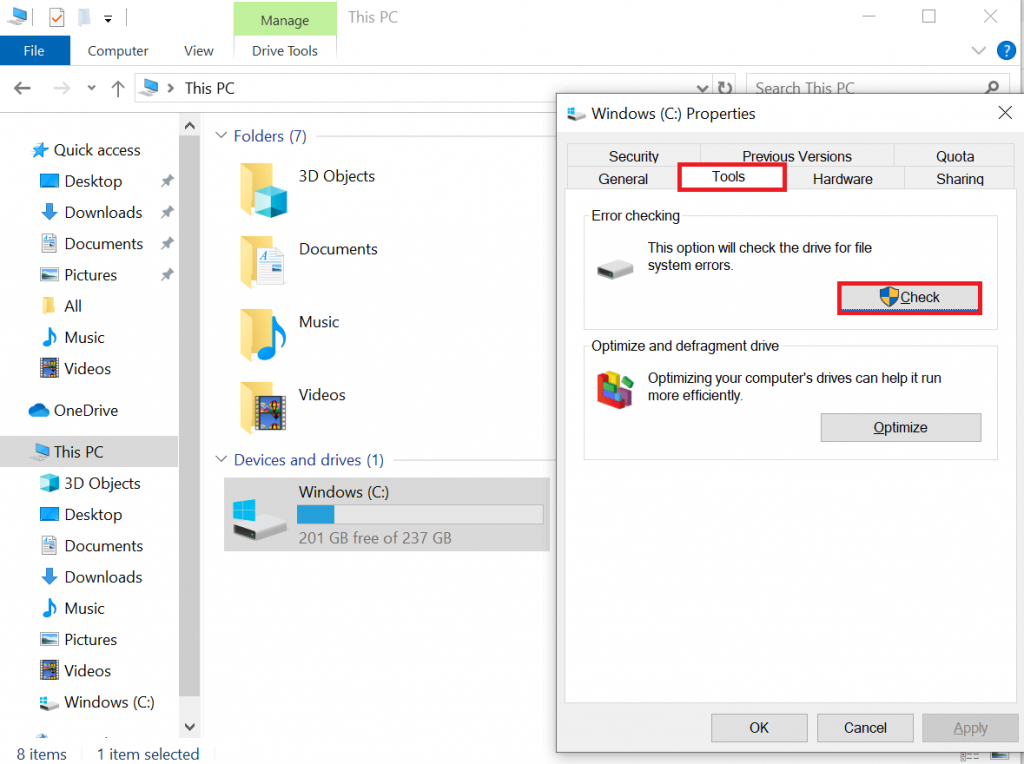
- Next click on the Properties tab. From the Properties window select Tools and then click on the Check button displayed under the Error Checking section.
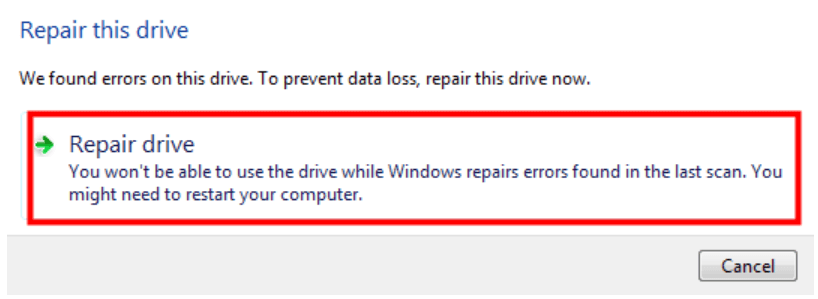
- If at all your Windows device is plagued with repairing drive stuck error, then the below pop-up will be displayed on your system screen. Click on Repair drive to scan the drive.
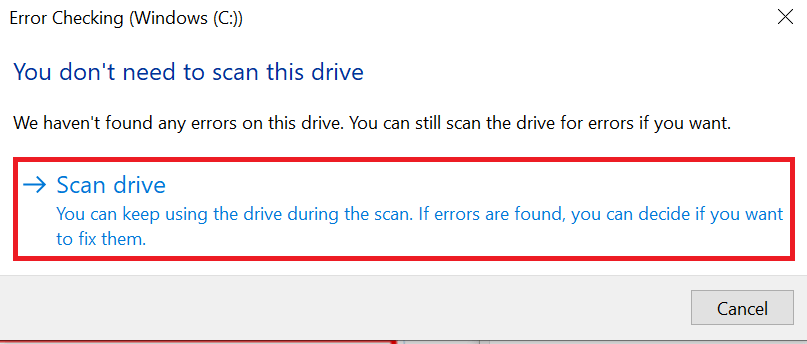
- If no error is found the below screen will get displayed. However, we still recommend you to scan your drive by clicking on the Scan drive button.
- Finally, reboot your PC and see if the problem is resolved or not.
Also Know: ‘Windows Has Detected an IP Address Conflict’ Error [Fixed]
Method 2. Run CHKDSK Command in Safe Mode
CHKDSK command is a useful way to check your drive for errors related to system files. Let’s learn how to use it to resolve Windows scanning and repairing issues while booting your PC.
- Boot your Windows 10 PC in safe mode.
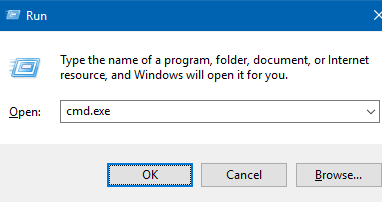
- Now press the Windows + R key to invoke the Run command on your computer.
- In the RUN window type cmd. Press the Shift+Ctrl+Enter key simultaneously on your keyboard to launch the Command prompt in Administrator mode.
- Next type the given command and press Enter. Command chkdsk x: /f (here “x” means the driver you want to scan and repair).

- Now wait until the scanning and repairing process completes
- Restart your computer to see if the issue is fixed. If not, move on to learn the next method.
Method 3. Check the Drive Status
If your system is plagued with drive-related problems, then follow below steps to repair them.
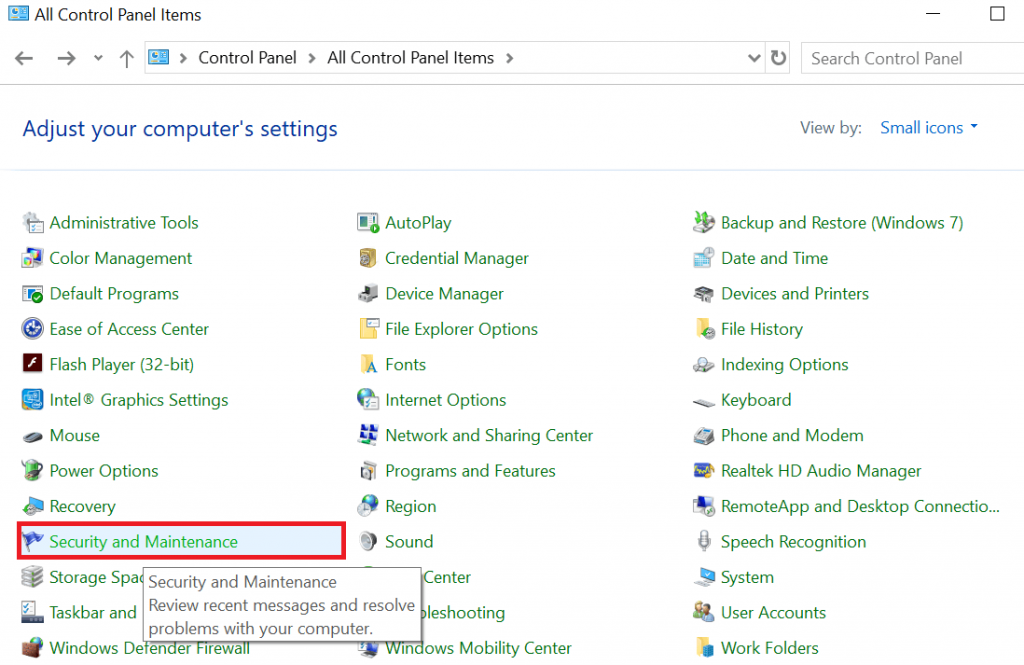
- Launch Control Panel on your computer.
- Now opt for view by the Small Icons option.
- Open the Security and Maintenance tab and under it choose Maintenance.
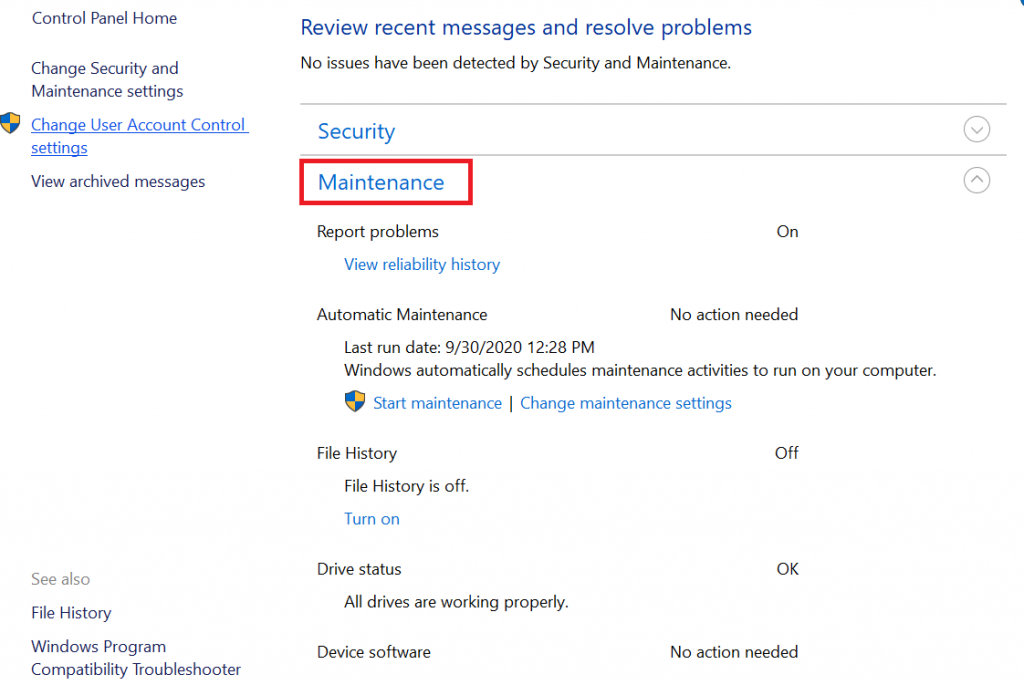
- Now under the Drive status, you will be presented with a link to repair your drives, click on it to start the drive scanning and repairing process.
Read More: How to Fix Windows Defender Error Code 0x8e5e021f
Method 4. Run Repair-Volume Drive Letter Command On Window PC in Safe Mode
If you are looking for an easy yet effective way to fix and repair scanning and repairing drive stuck errors on your Windows 10 PC, then follow the steps.
- Boot your Windows 10 PC in Safe Mode.
- Next in the search box type Powershell. Now right-click against the Windows PowerShell option and choose Run as Administrator from the context menu.
- This will open Powershell in the Administrator mode.
- Now type “repair-volume-drive letter x” and press the Enter key. Here “X” refers to the drive you want to scan and repair.

- Wait for the process to complete. Now restart your computer to see if the “scanning and repairing drive stuck” error has been fixed or not.
Scanning and Repairing Drive Stuck Error: Fixed
Hopefully, the above-mentioned methods will help you resolve and fix your problem. If you are facing scanning and repairing drives stuck while booting your Windows PC, then follow our step-by-step guide to solve the error easily and quickly.
Experts recommend that a Disk Defrag tool will also help you ensure the optimized and error-free performance of your disk drives. If you have any queries or doubts, please do not hesitate to leave a comment in the box below.


