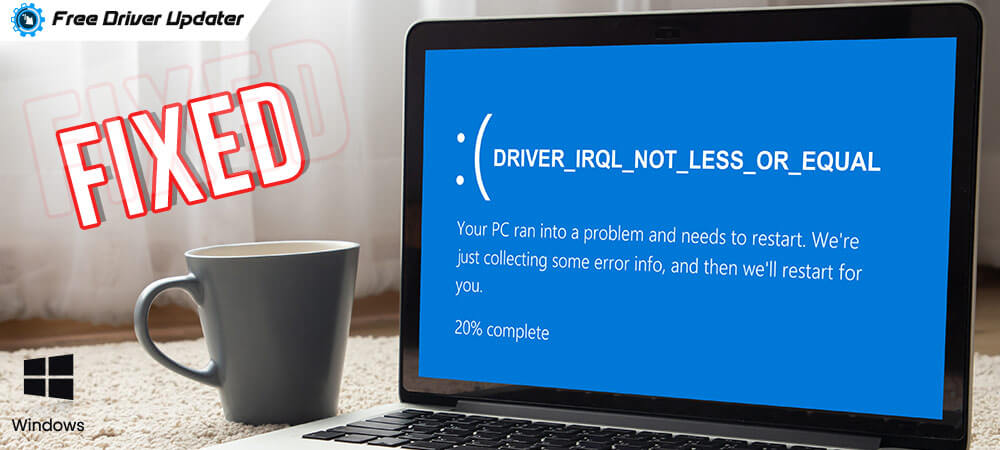
Are you experiencing the driver IRQL not less or equal blue screen error on windows 10, 8, 7? Then, this post is for you. Read on to the entire article to know how to get rid of this BSOD error!
Basically, this is a blue screen error that commonly occurs at Windows startup. This error is directly associated with the storahci.sys file. It is a system file that is included in every version of Windows OS. And, when these system files get infected you start encountering the error message Driver_IRQL_Not_Less_Or_Equal. Apart from this, there are numerous other reasons as well that can cause this error. Let’s read them!
- System File gets Infected due to internal or external error.
- Outdated or corrupt network drivers.
- Hardware and software malfunctioning.
- Due to new software changes.
- After Windows 10 update.
Important: In some scenarios, this error is not caused by the storahci.sys file. So, if you find another file name instead of storahci.sys. Then, no need to worry, even in that case, the below shared solutions will work for you.
Quick Methods to Fix Driver IRQL Not Less or Equal on Windows 10, 8, 7
It doesn’t make any difference which windows version you are accessing. The BSOD driver IRQL not less or equal error can occur on any version of Windows operating system. But you can easily fix this error just by following the below given effective methods.
Method 1: Uninstall Network Drivers
Majorly, you encounter this error at windows startup. But, many times it occurs every single minute. So, uninstall the Network drivers to fix this annoying error. However, there are two cases given below, choose whichever suits your state.
Case 1: When You Can Boot Windows Successfully
In the first case, when you are able to Boot Windows successfully without any sort of hindrance, then go with the instructions given below to uninstall the Network Drivers.
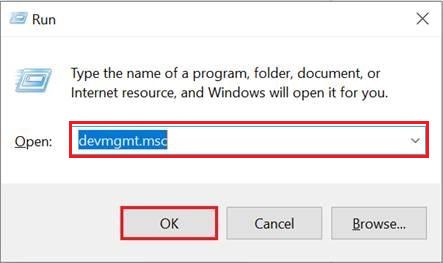
Step 1: To launch the Run Dialog Box, hit the Windows logo and R key from your Keyboard.
Step 2: Then, input devmgmt.msc inside the box and click on the Ok option.
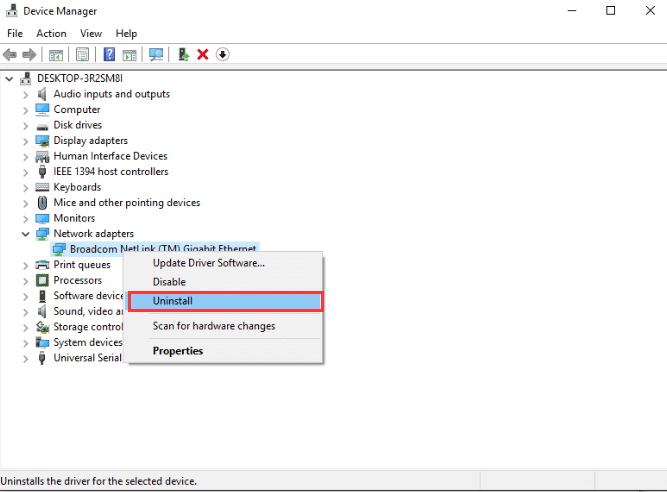
Step 3: This will present the Device Manager Window, now, locate the Network Adapters category and click on it to expand the category.
Step 4: Now, click right on the Network device to choose Uninstall Device from the menu list.
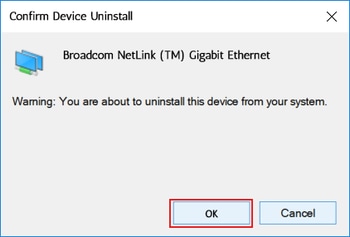
If a confirmation box will pop-up, then click on the Yes option to affirm it.
Just in case, if you have installed the wireless network adapters, then follow the above steps to uninstall the wireless network drivers. Once the uninstallation of the Network drivers is finished, then try to start your PC again just to check whether the issue is fixed or not.
Also Read: Computer Keeps Disconnecting from WiFi on Windows 10
Case 2: When You Aren’t Able to Boot Windows Successfully
In the second case, where you can’t boot windows successfully then you need to boot your system in safe mode. For the same, follow the below-shared steps to remove/uninstall the Network drivers.
Step 1: Boot your PC in safe mode by entering into it.
Step 2: Now, hit the Windows and R keys from the keyboard at the same time to launch Run Dialog Box.
Step 3: Thereafter, insert devmgmt.msc in the box and then press the Enter Key from the Keyboard.

Step 4: Once the Device Manager Window will pop-ups, then navigate to Network Adapters and click on it to expand the category.
Step 5: Next, right-click on the Network Device and then choose Disable.
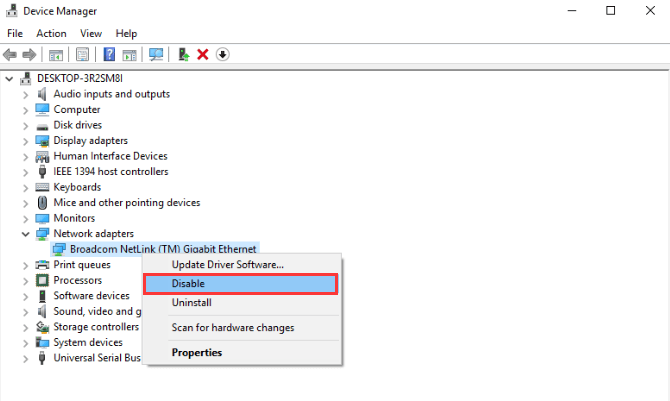
Step 6: Reboot your system.
If you have wireless network adapters then you can follow the same steps to uninstall the wireless drivers. Try this and check if the error driver IRQL not less or equal windows 7, 8, 10 fixed.
Also Read: How to Fix WiFi Network Not Showing Up on Windows 10
Method 2: Update Network Driver
After trying the above method still, the issue persists then tries to update Network drivers. However, you can update the network driver manually but it takes much time, plus, requires proper tech skills. In the scenario, where you don’t have much time or technical knowledge to update drivers manually, then you can use Bit Driver Updater.
Bit Driver Updater will automatically verify your PC and detect the suitable drivers for it. With this application, there is no risk of downloading or installing the wrong drivers. You can automatically & frequently update outdated network drivers with either the free or premium version of it.
But, it is worth noting, that with the premium version, it hardly takes one click to update all the faulty or broken drivers. Plus, with the premium version, you will receive complete assistance and a 60-days money-back guarantee. Hence, download Bit Driver Updater from the button given below and then follow the instructions given under the download button.
Step 1: Once downloaded, run the setup file of Bit Driver Updater to launch it on the system.
Step 2: Then, it will automatically begin scanning for the outdated drivers. But, just in case, it doesn’t start on its own then don’t worry, just click on the Scan button from the left menu pane and relax as it is scanning for the faulty ones.
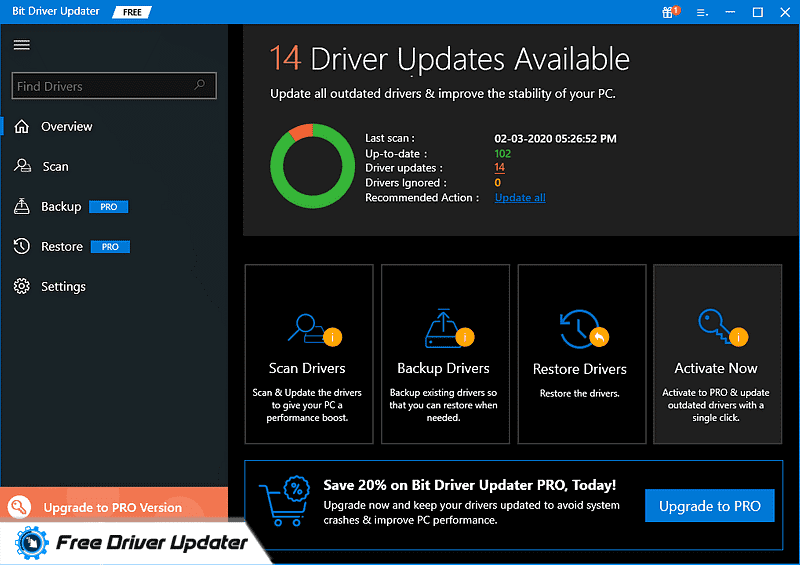
Step 3: Next, it will show the list of the corrupted drivers that need an update. You need to examine the list.
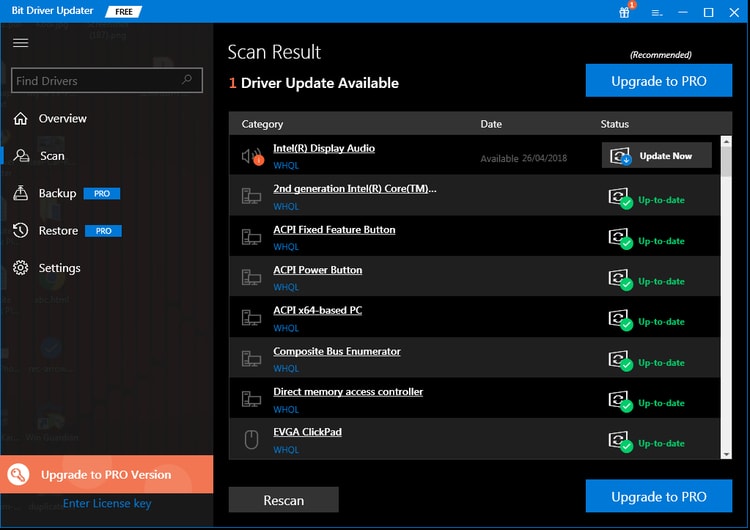
Step 4: At last, look for the particular driver that you want to update, and click on the Update Now option which is reflected next to the driver. Despite this, you can also click on the Update All option to update all the faulty, broken, or missing drivers within one click.

Also Read: DNS Server Not Responding on Windows: How to Fix It?
Method 3: Try Resetting Your Windows
If none of the above-suggested methods works for you in order to fix the BSOD driver IRQL not less or equal windows 10, 8, 7. Then, the last option which you can try is resetting your Windows. This will surely work for you to fix the same error because this deletes all the files from the system. So, just be sure to create a complete system backup on your Windows 10, 8, 7. Follow the steps given below to reset your PC.
Step 1: Launch the start menu and then click on the Power option.
Step 2: Then, hold the Shift key from your keyboard and then choose the Restart option from the menu list.
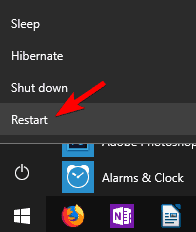
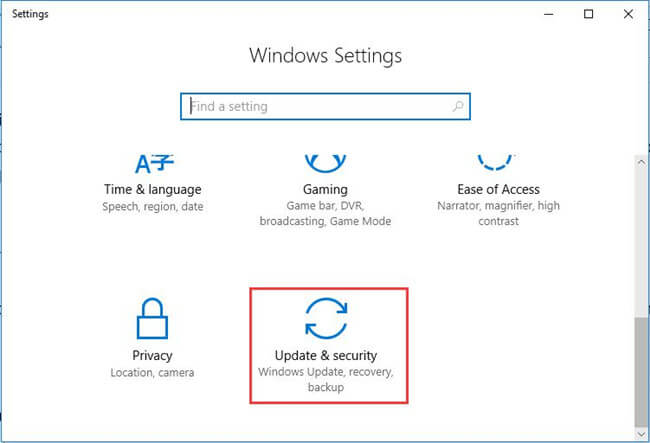
Step 3: When the PC restarts successfully, then press the Windows and I key at a time to invoke Windows Settings. Then select Update & Security.
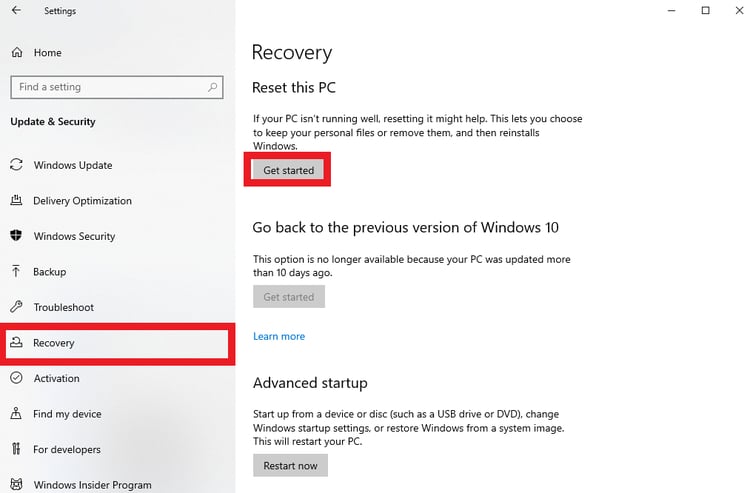
Step 4: Later on, choose Recovery from the left pane. Next, navigate to the Reset this PC and then click on the Get started option under it.
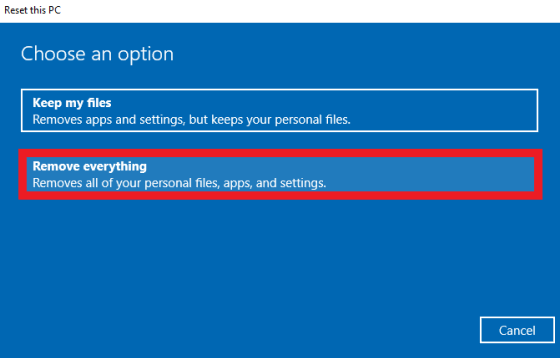
Step 5: Next, choose the Remove Everything option.
After this, go with the onscreen instructions to finish the reset. Once reset is done successfully, then install the applications and then transfer the files which you have backed up. Now, you will see that error driver IRQL not less or equal gets solved.
Also Read: How to Fix Windows 10 Network Connection Issues
Driver_IRQL_Not_Less_OR_Equal Error on Windows 10, 8, 7 (FIXED)
Hopefully, you can fix the driver IRQL not less or equal error on windows 10, 8, 7 with the above solutions. While performing the method if you face any kind of queries, then feel free to share it with us through the comment box below.
We assure you that we help you out in the best way possible. Plus, for receiving more such informative posts don’t forget to subscribe to our Newsletter.


