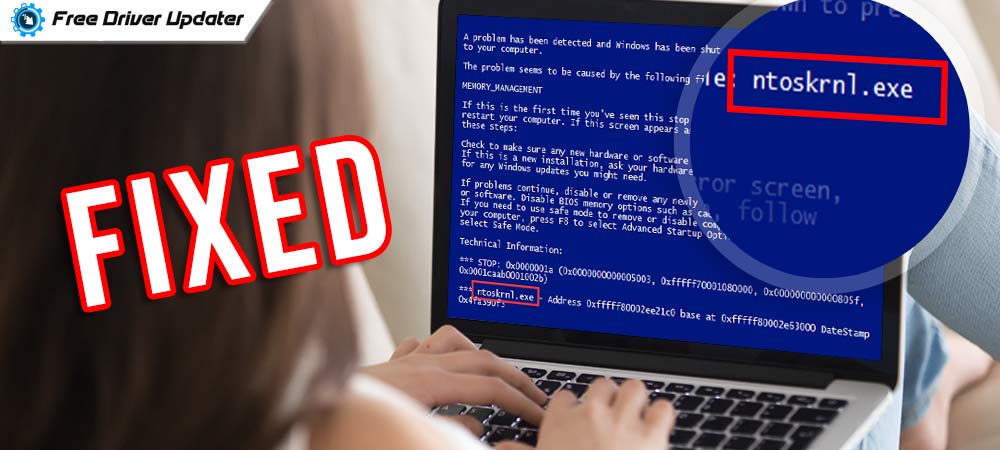
Encountering an unexpected ntkrnlmp.exe blue screen error on Windows 10, 8, 7 PC? Don’t worry, you are not alone. Many Windows users have lately reported the same error, and are unaware of how to get rid of this. To help you, we have prepared this guide containing the most workable solutions to resolve the error and get the PC back on right track.
Before getting started, here is a quick overview of what the ntkrnlmp.exe error is and what causes this issue.
What Does ntkrnlmp.exe Mean?
ntkrnlmp.exe is a BSOD (Blue Screen of Death) error. It is an executable file related to Windows OS. At the time, when your Windows operating system begins running on your PC, the applications that include ntkrnlmp.exe files will be performed and loaded into RAM and processes there, as an NT Kernel & System.
Talking about the causes, corrupted, outdated, or broken graphics drivers are the major culprits behind the occurrence of ntkrnlmp.exe blue screen error. Apart from that, viruses, malware, and suspicious files may also run you into this error, and prevent your computer from functioning properly as expected.
A List of Solutions to Fix ntkrnlmp.exe Blue Screen Error on Windows 10, 8, 7 PC
Here, we have put together 4 effective yet convenient ways to resolve ntkrnlmp.exe blue screen error. However, you may not need to try each of them, just go through each and then choose the one that works best for you.
Solution 1: Update your Graphics Driver
If you are using outdated, missing, or faulty graphics drivers on your computer, then you may encounter ntkrnlmp.exe blue screen error. So you should keep your graphics card drivers always up-to-date to lead to the better performance of your system.
You can search for the correct drivers manually by going to the official website of the graphics card manufacturer. This takes a lot of time and a good amount of technical knowledge. We advise you to use this method only when you are confident with your technical expertise.
If you are a newbie and don’t have experience in the technical niche, no worries, you can use Bit Driver Updater to find and install the latest version of drivers automatically.
Bit Driver Updater is intelligent software that has the potential to get all the faulty drivers fixed with a single click of the mouse. Not only that, but the software is good enough to resolve numerous Windows-related issues. To know how to update outdated graphics drivers with Bit Driver Updater follow the simple steps below:
Step 1: Click on the link below to download Bit Driver Updater for Free.
Step 2: Double click the .exe file and perform the on-screen provided instructions to finish the software installation.
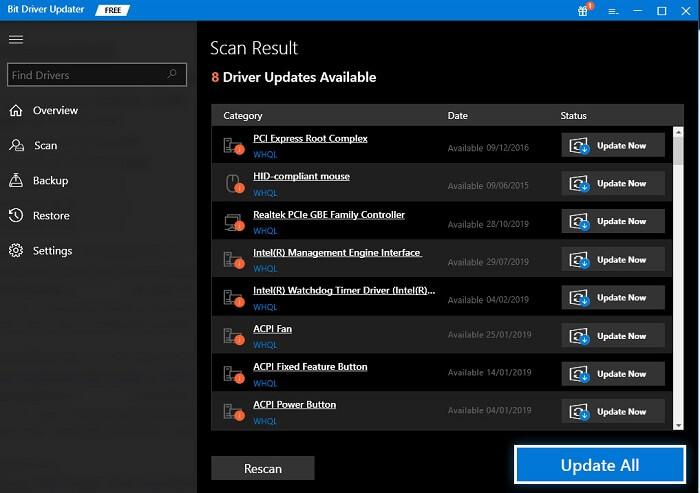
Step 3: Invoke Bit Driver Updater and let it scan your machine for faulty or out-of-date drivers.
Step 4: Check the scan results and locate the graphics drivers having issues.
Step 5: Click on the Update Now button shown adjacent to the driver.
Step 6: If you see other drivers also need to be updated, then click on the Update All button instead. In this way, you can update all outdated drivers at once.
That’s all! See how easily and quickly you can install the latest version of drivers through Bit Driver Updater. It is recommended to upgrade to the pro version of Bit Driver Updater. This will let you access the advanced features of the utility. You can get a money-back guarantee and complete technical support.
Also Read: How to Fix Blue Screen of Death Error on Windows 10
Solution 2: Fix Corrupt System Files
You may get ntkrnlmp.exe blue screen error on Windows 10, 8, 7 because of the corrupt, faulty, missing, or damaged system files. To check if this is the matter, you should perform a Windows repair. In order to repair the faulty system files on the Windows system, you can either run an SFC scan or use Reimage tool.
Steps to Run SFC Scan to Fix ntkrnlmp.exe Blue Screen Error
SFC (System File Checker) is a useful feature in the Windows operating system that scans your PC for corrupt or missing system files and repairs them too. Follow the steps shared below to do so:
Step 1: Altogether press Windows Logo + R keys on your keyboard to launch the Run Dialog box.
Step 2: Type, cmd in the Run box and press CTRL + SHIFT + ENTER at the same time.
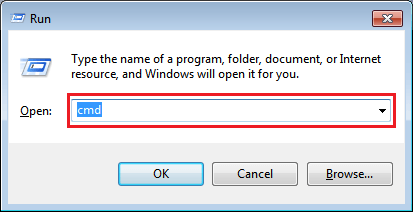
Step 3: This will bring up the Command Prompt under administrator privileges.
Step 4: In the Command Prompt (Admin) window, write sfc /scannow and hit the Enter key from your keyboard.

Step 5: Wait for the process to detect and repair the corrupted and damaged system files.
Step 6: Once completed, reboot your computer to save the recent changes.
Steps to Solve ntkrnlmp.exe Blue Screen Issue Using Reimage
Reimage is a tool to detect and replace corrupted files on Windows operating systems. Here is how to do it:
Step 1: To get started, you need to download and install the Reimage tool.
Step 2: Then, launch the Reimage and click on YES if a box prompts asking “Would you like to scan your PC?”.
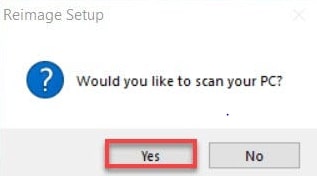
Step 3: Now, you need to wait for a while until Reimage scans your PC.
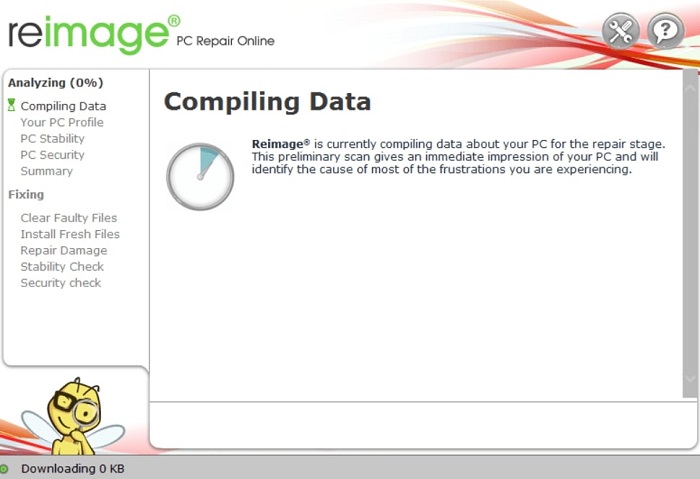
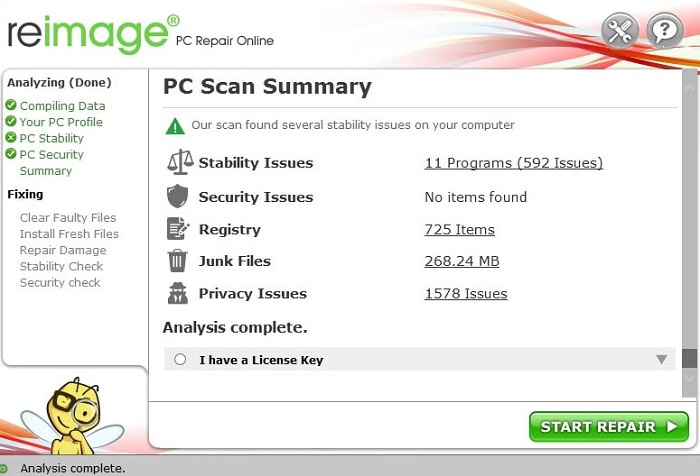
Step 4: Once the scan completes, you will see a report of the problems found on your system. To get started with the repair function, you have to buy the full version.
Step 5: Reboot your PC.
Important: The full version of Reimage offers a 60-days complete money-back guarantee and round-the-clock support.
Now, try to check if the ntkrnlmp.exe blue screen error is solved. If the issue persists, move on to the next solution.
Also Read: [Fixed] wdf_violation Blue Screen Error on Windows 10 – Free
Solution 3: Check for Malware and Virus
Viruses and malware are also responsible for bringing up the ntkrnlmp.exe blue screen error in Windows PC. So, you should develop a habit of running a virus scan frequently in your computer system. It may take a long time to finish the scan, but it’s worth trying.
However, Windows has a built-in tool, Windows Defender for this task, but it doesn’t work as expected. So, it is recommended to use any best free or paid third-party antivirus software like Panda, Avast, and more.
If any malware and virus have been found, then perform the instructions provided by the antivirus software. Then, test to see if it worked. Unfortunately, if not, then try the next solution mentioned below.
Also Read: Fix the “Thread Stuck in Device Driver” error in Windows 10/8/7
Solution 4: Configure Driver Verifier Manager
If nothing has worked in your case, then this method as a last resort might help. All kernel-mode drivers are managed under Driver Verifier. It detects drivers’ issues and illegal functions that might corrupt the system and also provides available and effective solutions for the problems. To do so, follow the steps outlined below:
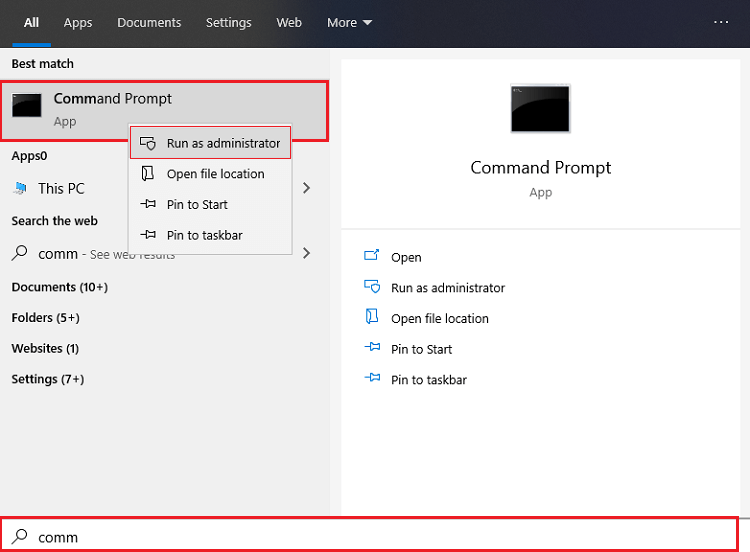
Step 1: Go to the search bar, type comm, select Command Prompt from the searched results and run it as administrator.
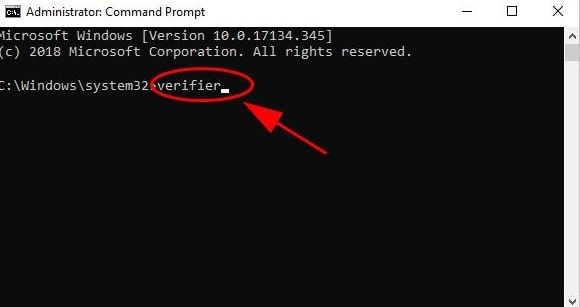
Step 2: In the command prompt (admin) window, input verifier and hit the Enter key from your keyboard.
Step 3: This will take you to the Driver Verifier Manager, choose Create Standard Settings and make a click on Next to proceed further.
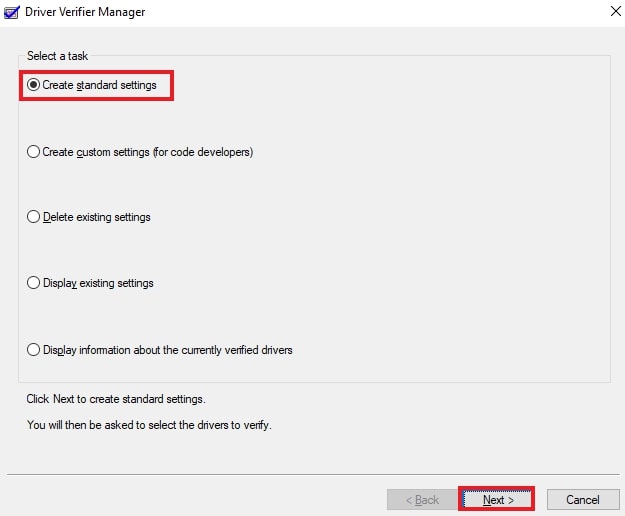
Step 4: Next, click on the option saying Automatically select all drivers installed on this computer and click on Finish to initiate the verification process.
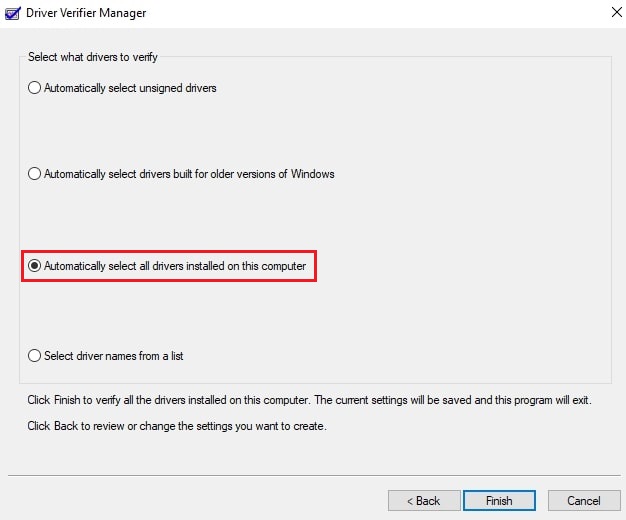
Step 5: Now, click on OK and reboot your PC.
Once done, you will see a complete report regarding the driver’s status. To fix the possible glitches, try the listed solutions.
In order to stop the Driver Verification process, follow the steps below.
Step 1: Launch Command Prompt under admin privileges.
Step 2: Input Verifier and hit the Enter button from your keyboard.
Step 3: Now, in the Driver Verifier Manager window, choose Delete existing settings.
Step 4: Click on Finish.
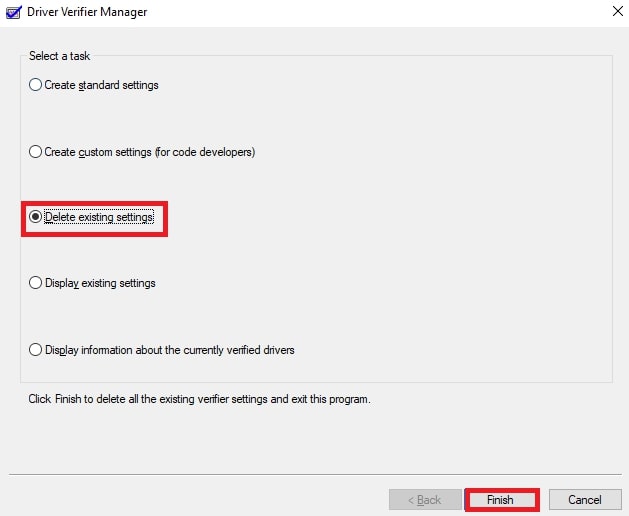
Step 5: Lastly, click on YES and start your PC again.
Now, the blue screen error should be resolved. If you want to know more about the Driver Verifier Manager, just go through the Microsoft Document.
Also Read: How to Fix Ntoskrnl.Exe BSOD Blue Screen Error on Windows
ntkrnlmp.exe Blue Screen Error on Windows 10, 8, 7: FIXED
So, that was all about how to fix ntkrnlmp.exe blue screen error on Windows PC. Hope, these troubleshooting tips help you.
Please let us know your queries and further suggestions, or ideas in the comments below. Additionally, do tell us in the comments, “which solution worked for you?”.
If you liked our write-up, then do subscribe to our Newsletter for more helpful information related to the tech realm. Along with this, you can also follow us on Facebook, Instagram, Twitter, and Pinterest.


