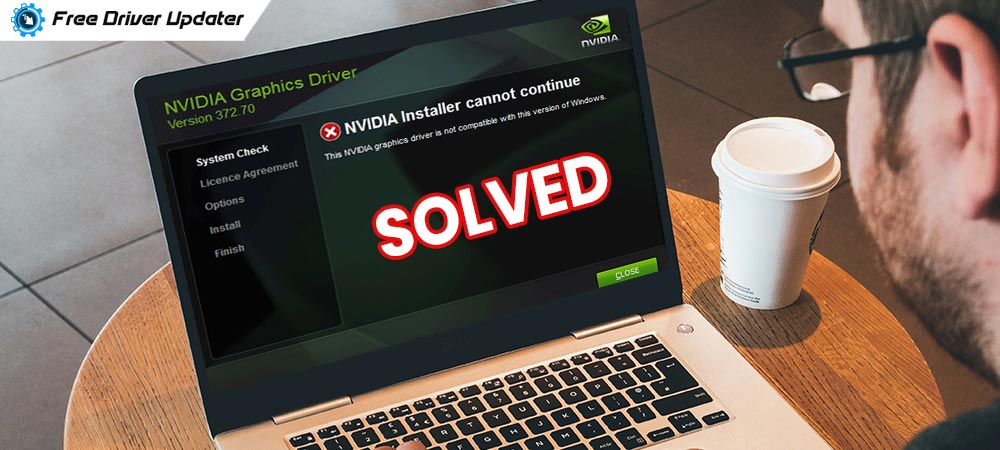
You cannot install NVIDIA graphics driver and see the error saying “NVIDIA installer cannot continue” or “NVIDIA installer failed”? If yes, then don’t panic as there are some easy fixes available to deal with this error. Many Windows users have reported facing the same problem when they are trying to install the latest drivers for the NVIDIA graphics card.
This error screen consists of a message that reads, “NVIDIA Installer cannot continue. This graphics driver could not find compatible graphics hardware.”
Since you have landed on this page, we believe that you are also struggling to find the solutions detailed around the same issue. Considering this, here in this post, we are going to provide some easy and quick fixes to resolve the NVIDIA installer cannot continue Windows 10 error.
Ways to Fix NVIDIA Installer Cannot Continue Error on Windows 10
Well, there can be numerous causes behind the NVIDIA installer failure error. Therefore, to solve this problem, you need to work your way down the below list of solutions until you find the one that works for you.
Way 1: Download & Update NVIDIA Graphics Driver
It is given that outdated or faulty drivers are solely responsible for most of the Windows errors. Hence, updating them is one of the best solutions that you can try to prevent many fatal errors and get a trouble-free PC experience. NVIDIA installer failed error is also a consequence of faulty hardware or bad graphics card drivers on your computer system. Hence, to resolve it, you should try installing a recently released or well-updated version of your out-of-date NVIDIA driver.
We have below explained both manual and tool-based automatic approach to download and install the latest graphics card drivers. Depending on your requirements, you may opt for any of the below-listed methods.
A) Update NVIDIA Graphics Driver Manually
Below are the step-by-step instructions on how to update the Nvidia graphics driver manually using the Windows in-built utility Device Manager.
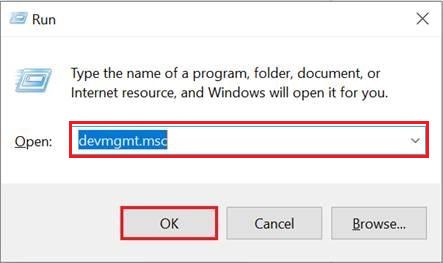
- Press Windows logo + R key together on your keyboard to launch the RUN dialog box.
- Type in “devmgmt.msc” and click the Ok button to launch the Device Manager application.
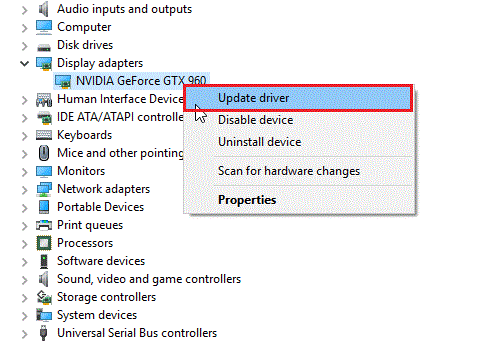
- Scroll down and expand the ‘Display adapters’ category by simply clicking on it.
- Right-click on your NVIDIA device and choose the ‘Update driver’ option.
- On the subsequent prompt, you’ll be asked how you want to search for the latest driver software. Choose the automatic option.
- Now, wait until Windows finds and installs a newly released driver version for your NVIDIA GeForce GTX 960 card.
- At last, reboot your laptop or desktop and check if Windows is still showing NVIDIA installer cannot continue error.
Also Read: NVIDIA Control Panel Missing in Windows 10, 8, 7 [Solved]
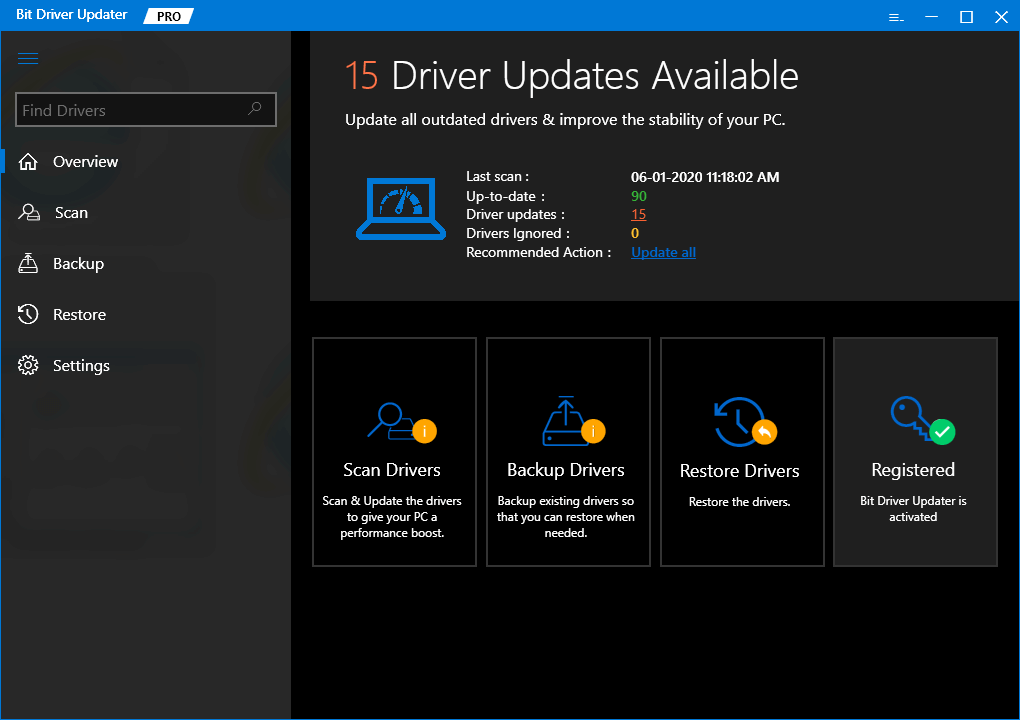
B) Update NVIDIA Graphics Driver Automatically (Recommended)
You can save your valuable time by using an automatic driver update and repair software that can take care of your outdated and faulty device drivers. Thus, if you don’t want to perform several manual steps, then we would recommend you to use the Bit Driver Updater application to update Nvidia or any other PC drivers. You can try this intelligently programmed tool for free as it is currently available for free to download.
Way 2: Reinstall NVIDIA Graphics Card Driver
Incorrect driver installation is also one of the major causes behind the sudden occurrence of the NVIDIA installer failed issue. Therefore, installing the NVIDIA driver again is another effective solution that can help you fix NVIDIA installer cannot continue error in Windows 10. Here are the simple steps for doing the same.
- Open Device Manager Tool on your system.
- Click on the ‘Display adapters’ category to expand it.
- Choose your Nvidia device and right-click on it. Then, select the ‘Uninstall’ option from the context menu.
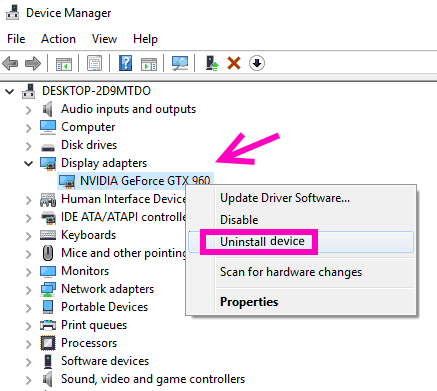
- After doing this, open the Device Manager application again and go to the ‘Action’ tab.
- Choose the ‘Scan for hardware changes’ option.
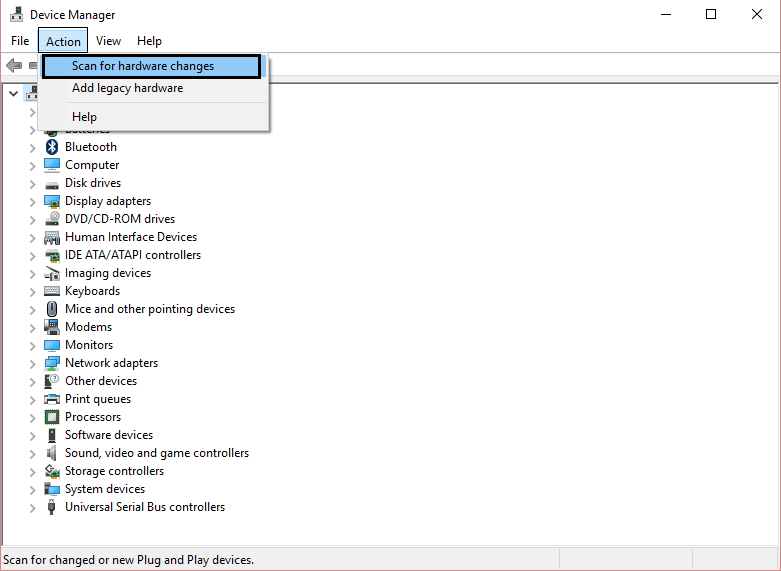
- Post this, the Windows operating system will then try installing the NVIDIA driver again.
Finally, restart your computer for these changes to take effect. The setup or installation package should now work without the NVIDIA installer cannot continue error on Windows 10.
Way 3: Enable Your NVIDIA Graphics Card
If you’re still encountering ‘NVIDIA installer failed’ or ‘NVIDIA installer cannot continue’ error message, then there’s a possibility that your Nvidia graphics card is disabled. If that’s the case, you will get the same error message over and over again, no matter how many times you try to install drivers for your NVIDIA graphics card. You can use the Device Manager utility to check whether your graphics card is enabled or not. Here are the steps to do so.
- Launch the Device Manager application.
- Click on the arrow icon next to the ‘Display adapters’ category to expand it.
- Right-click on your NVIDIA graphics card. If you see an Enable option in the context menu, click on it.
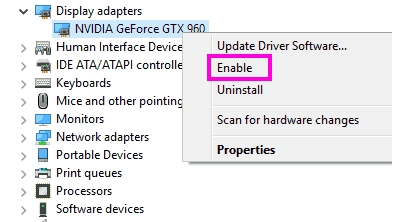
- At last, reboot your computer and check if that helps fix NVIDIA installer cannot continue error Windows 10.
Also Read: Nvidia GeForce GTX 960 Driver Download, Install and Update
Way 4: Rename the NVIDIA Folder in Program Files
Several users have reported that they were able to resolve NVIDIA installer failed issue after they changed the name of the NVIDIA Corporation folder in Program Files. Therefore, you can give it a try as well. Here are the required steps for doing the same.
- Open the system partition (Local Disk C) where your computer’s operating system is installed.
- Scroll down and look for a folder named Program Files.
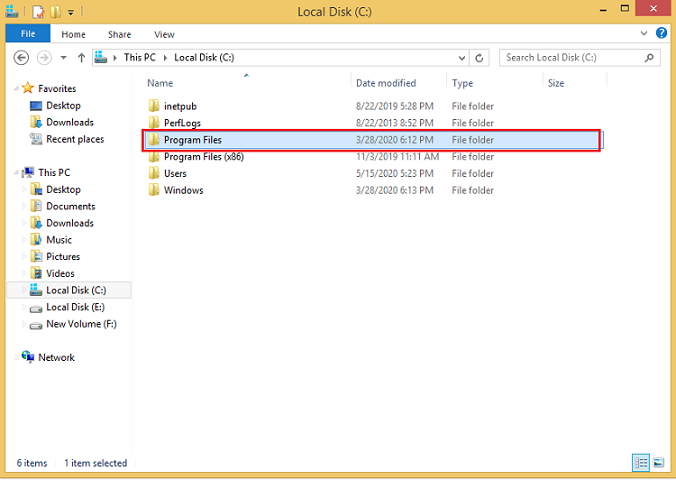
- In Program Files, search for a folder named NVIDIA Corporation. Right-click on it and choose the Rename option from the context menu.
- Edit the name and press the Enter button on your keyboard.
- Now, try installing the NVIDIA driver again. The setup should be working without any NVIDIA installer failing errors now.
NVIDIA Installer Cannot Continue: Resolved
Through the solutions listed in this article, we have learned how to fix NVIDIA installer cannot continue error on Windows 10 PCs. Hope this post comes in handy and helps you install the latest drivers for your Nvidia graphics card. Moreover, if you know some other helpful ways to resolve the NVIDIA installer failed issue, then do let us know about them via leaving a comment in the below box.


