In this following write-up, we are going to discuss several quick and easy ways to download, install, and update CPU drivers on Windows 10 PC. Read on to know more.
A central processing unit, commonly shortened to CPU, is known as the heart of the computer that keeps it alive and in the working condition. Thus, in order to ensure the smooth working of the computer and alter or modify the behavior of CPU functionality, one must have the latest version of CPU drivers installed on a laptop or desktop.
Keeping CPU (motherboard chipset) drivers up-to-date helps prevent various device conflicts and makes sure your computer performs all the functions seamlessly and with ease. However, if you don’t know how to download CPU Drivers, then do not worry as we’ve got you covered. In this CPU driver download guide, we’re going to talk about the various methods on how to check for the latest driver updates and install them on the Windows system.
Easy Ways to Download & Update CPU Drivers in Windows 10 PC
Our next segment will show you manual as well as the automatic method to download and install the latest update of CPU drivers for Windows 10. Now, let’s not waste more time and begin with the first one.
How to Update CPU Drivers Manually on Windows 10
There are basically two ways to manually download and install the most recent CPU (motherboard chipset) drivers: Device Manager and Manufacturer’s Support Website. Let’s explore each of them in detail below.
Note: Manual process of updating drivers is quite tiresome and demands a lot of computer skills, time, and patience. Plus, downloading and installing the wrong CPU or motherboard chipset drivers can also adversely affect your system’s performance and even cause a number of issues such as crashes and blue screen of death.
A. Download & Update CPU Drivers via Device Manager
This manual method of CPU driver update relies on Device Manager, a built-in tool in Windows that allows users to manage all the hardware devices and their respective drivers installed on a computer system. Here are the steps to help you manually update your chipset drivers with the Windows Device Manager tool.
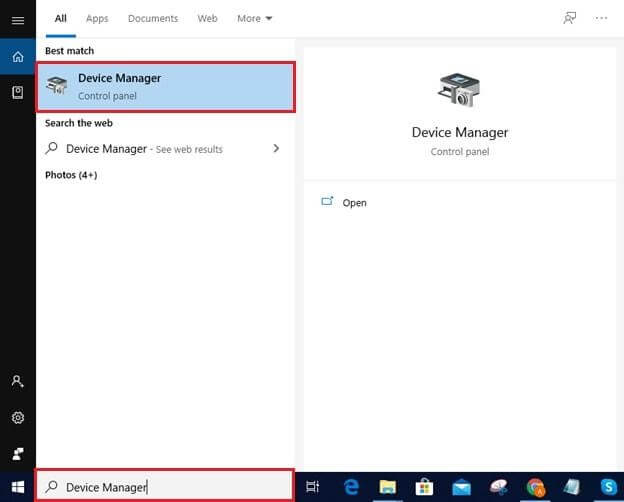
- In the Cortana search box, type device manager and then select the Best match result.
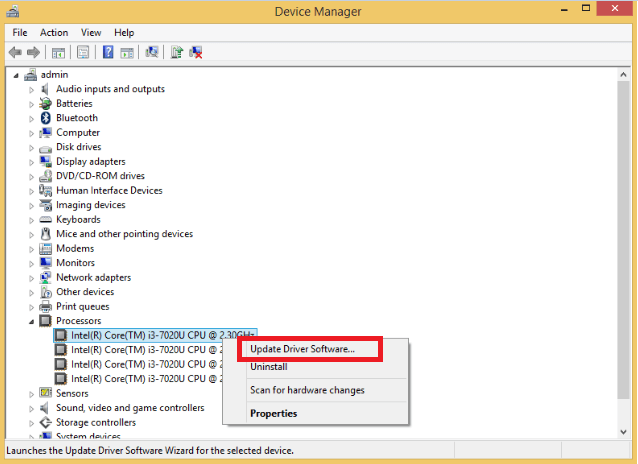
- Scroll down and click on the Processors category to expand it.
- Right-click on your CPU device and choose the ‘Update Driver Software’ option.
- In the next window, select the ‘Search automatically for updated driver software’ option.
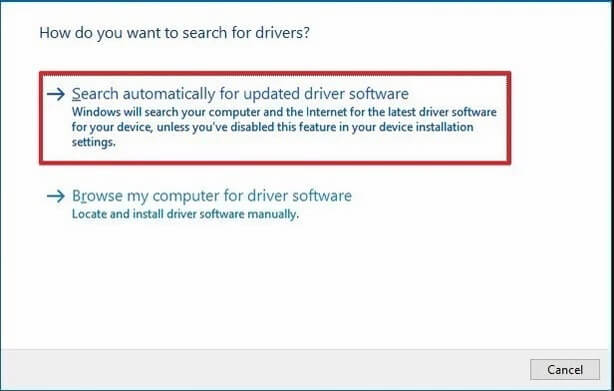
If Windows finds a new CPU driver update, it will download and install it on your PC. If it doesn’t, then you can try searching for one on the official vendor’s website.
Also Read: How to Fix Windows Modules Installer Worker High CPU in Windows 10
B. Download & Update CPU Drivers via Manufacturer’s Website
The next method to manually download CPU drivers is via the official manufacturer’s support website. Here are the steps to help you with the process.
- Go to the manufacturer’s official support website (i.e., HP, Intel, AMD, or Raspberry).
- Search for a suitable driver version as per your device’s OS and product model.
- Download the CPU driver package on your system.
- Double-click on the downloaded file and then follow the instructions displayed on your screen to finish the installation process.
How to Update CPU Drivers Automatically on Windows 10
After exploring the manual methods of updating CPU driver mentioned in the above article, some of you might feel that they are quite tedious and time-consuming. The good news is that you can avoid performing all the aforementioned complicated steps and rather download CPU drivers for your Windows 10 PC automatically with Bit Driver Updater.
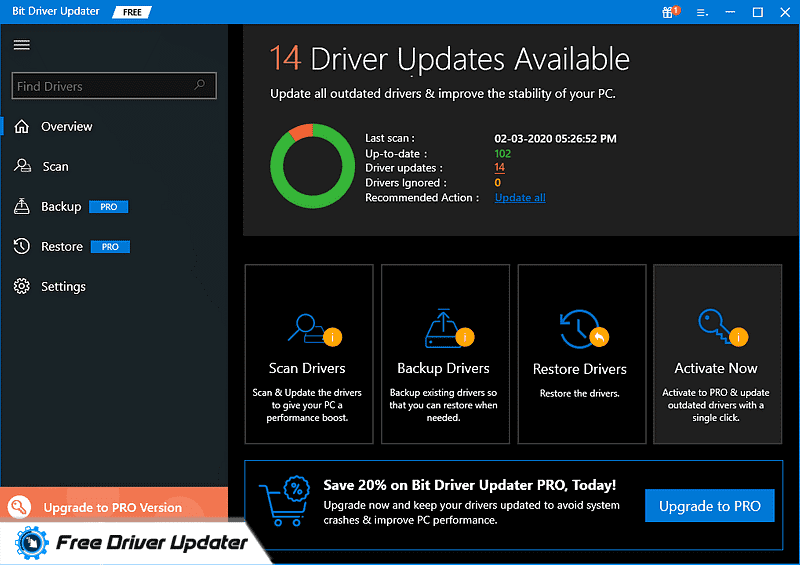
This powerful driver management program automatically finds and installs the most updated versions of CPU and other device drivers in just a single mouse click. Apart from this, it encompasses several useful features that help keep your hardware components performing in tip-top condition. Below are the few simple steps to use it.
- Launch Bit Driver Updater application after successfully installing it on your PC.
- Click on the Scan Drivers button to let the tool detect problematic drivers.
- From the list of faulty drivers, click on the Update Now button next to the CPU driver.
Also Know: WMI Provider Host: High CPU Usage on Windows 10 [Resolved]
Best Approach to Download CPU Drivers for Windows 10
Now that you are well-versed with the several methods to download and update CPU drivers, let’s conclude this post by evaluating the best one. There’s no doubt that all the methods mentioned above are quite effective in downloading and installing the latest driver updates for the motherboard chipset. But then again, some of them still have a few shortcomings and due to which we cannot consider them as ideal. Hence, we strongly recommend using Bit Driver Updater to download and update CPU device drivers in Windows 10. Lastly, before you leave, let us know which method worked best for you via leaving a comment in the below section.


