
Is your Google meet camera not working properly on your Windows device? If yes, then check out this article providing different approaches to fixing this issue.
Google Meet is one of the best video conferencing services that a lot of people use while working from home. Google Meet has a lot of different features, such as integration with Google apps, screen sharing, a noise-cancellation filter, messaging services, two-way audio, etc. These are some of the things that make it one of the most popular and best video conferencing apps.
However, that being said, just like any other video conferencing software, Google Meet also shows some errors and issues like Google meet camera not working. This is a common issue faced by many users, so there is nothing to worry about. If you are one of those users who are facing this problem, then you should try the different fixes mentioned in this article.
How To Fix Camera Not Working On Google Meet
There are several reasons why your Google meet camera not working properly. For example, the application does not have camera access, your camera is disabled, the application is outdated, issues with your internet connection, etc. To make your Google meet camera work again, implement the following methods.
Fix 1: Give Camera Access To Fix Google Meet Camera Not Working
A common cause of the “Google Meet camera failed” error is that the camera permission has been blocked. When you use Google Meet for the first time, you do have to permit it to use your camera. However, sometimes people block or deny permission by accident.
To make sure this isn’t the cause of your Google Meet camera not working problem, check Windows camera permissions in the setting. Below are some steps that will allow the app to access your camera.
- Search Settings in the taskbar and then press the Enter key on your keyboard
- On the Settings window, select the Privacy settings
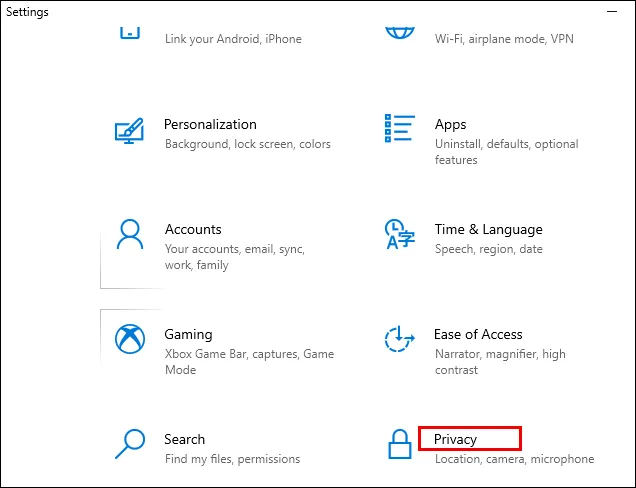
- Click on the Camera tab present on the left-side panel
- Turn ON the toggle switch under the “Allow apps to access the camera” heading.
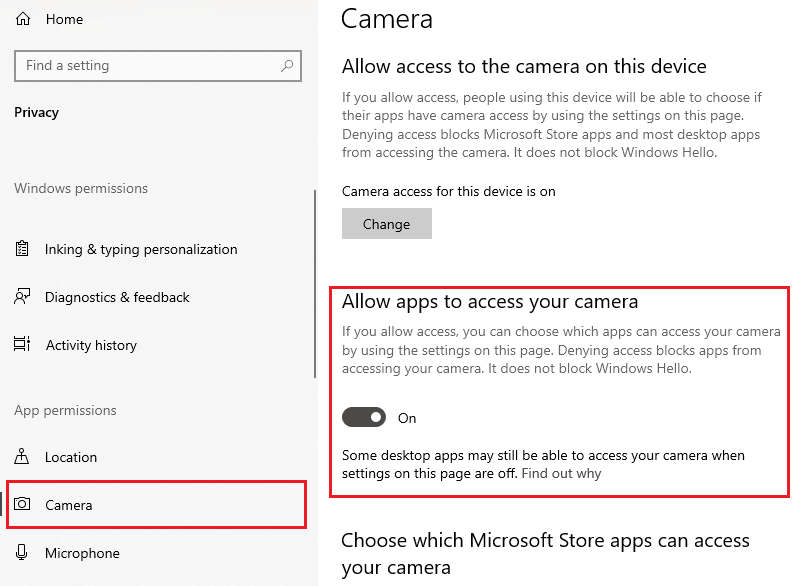
- Then, scroll down and all the apps that need your camera access will be displayed to you. Again turn ON the toggle switch in front of the Google Meet app.
Note: You can perform the same method if your Google meet microphone not working. The only change is that instead of selecting the Camera tab, click on the Microphone tab and then Turn ON the toggle switch.
Once the process is finished, check whether your camera not working on the Google meet error is resolved or not. If not, then jump on to the next approach.
Fix 2: Make Sure That No Other App Using The Camera
If you have multiple video calling apps open at the same time on your computer, it might say “Google Meet camera failed” if it can’t find your webcam. This is the most common reason why Meet or any other video-calling app won’t work with your camera. It happens when one of the background video conferencing services uses your webcam and accidentally blocks other apps from using it.
In this case, your best bet is to find out if your device’s webcam is being used somewhere else. To do this, all you have to do is look at the LED next to the webcam. If it’s on, it means that an app on your device is using the camera. You’ll need to find this app and close it to fix the camera not working on the Google Meet issue.
If it’s not on, you might need to check your browser for the same thing. To fix this camera not working on the Google Meet issue, close any other browser tabs that might get in the way of Meet’s webcam access. Then, check if your webcam is working properly or not.
Also know: How To Fix MSI Camera Not Working in Windows PC
Fix 3: Restart The Browser
Web browsers like Safari, Firefox, Microsoft Edge, and Google Chrome often have bugs that stop some parts of the system from working properly. Google Meet has been known to have bugs that make it impossible for it to use a device’s camera or microphone.
So, if you see a black screen or the ‘camera failed google meet’ error and none of the other fixes work, close all the other tabs and restart the browser. Additionally, you can visit: chrome:/settings/system on the Google Chrome browser and disable the “Use Hardware Acceleration when available” setting. This will also force Chrome to start up again.
Fix 4: Update Your Web Browser
Make sure that the latest version of Google Chrome or any other browser you use is installed. You can set these browsers to automatically update so they always have the latest version. You can follow these steps to update your Google Chrome browser and fix the camera not working on the Google Meet issue.
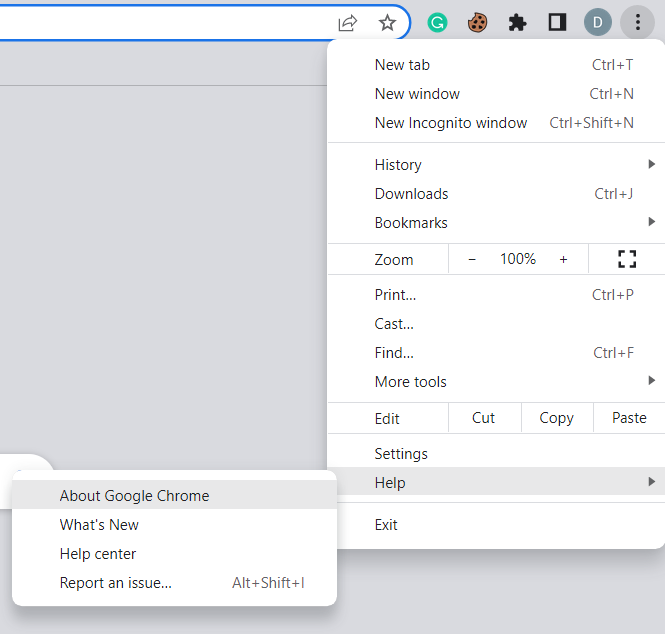
- Launch the Google Chrome application
- Click on the three dots shown on the top-right corner of the page and then click on the Help option from the list.
- Select the About Google Chrome option from the Help dropdown menu
- A new page will be displayed to you, over there check for the pending updates. If there is any, click on the Download button and it will automatically download and install the latest version of the application.
After updating your Google Chrome app, check if your Google meet camera not working issue is resolved or not. If not then try updating your camera drivers by following the next fix.
Fix 5: Update Camera Drivers To Solve the Google Meet Camera Not Working Issue
In the case your Google meet camera not working, the best thing to do is to reinstall or update your camera driver either manually or automatically. If you want to go with the manual process, you need to have patience and some technical knowledge. Whereas for the automatic process, all you need is to download and install the best third-party driver updater software like Bit Driver Updater. Then, with just a single click you can update all your drivers at the same time.
Resolve the Google Meet Camera Not Working Issue By Updating Drivers Manually
For the manual process, we have to take help from the Windows integrated utility called the Device Manager. This tool allows Windows users to manage all kinds of drivers present on their computers. To use this tool, follow the steps mentioned below.
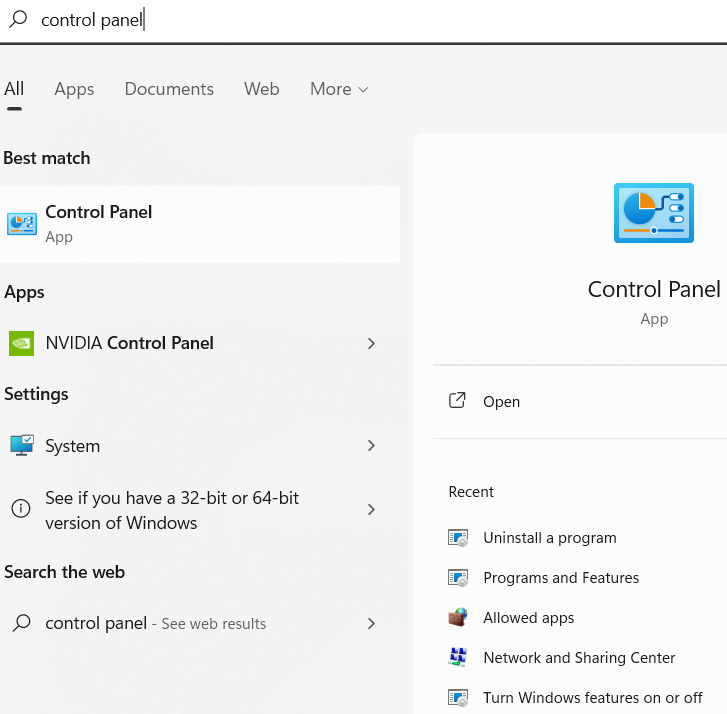
- Click on the taskbar’s search bar and type Control Panel in it. Then, click on the Control Panel app shown on the search bar.
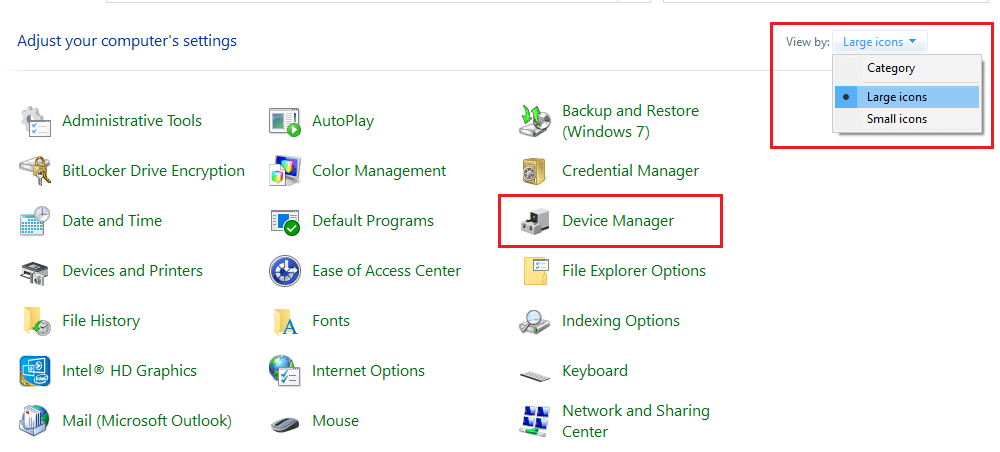
- Change the icon’s design by clicking on the “View by” dropdown menu and selecting the Large icons option. A list of Windows-integrated tools will be displayed on the page.
- Double-click on the Device Manager tool. A new Device Manager window will appear showing all the drivers on your computer.
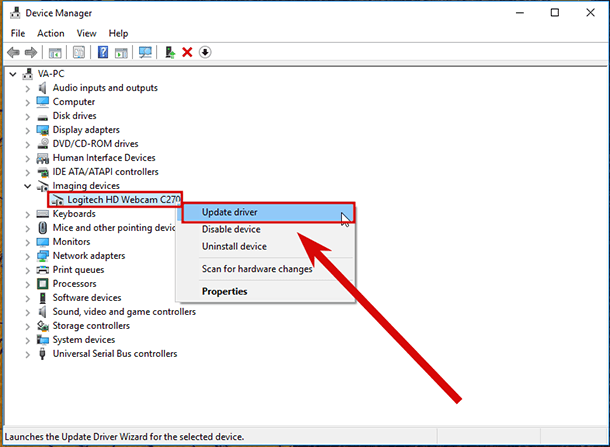
- Click on the arrow icon next to the Imaging devices option. Then, right-click on the webcam you are using for the Google meet and select the Update driver option from the list.
- A new pop-up window will open, over there choose the “Search automatically for drivers” option
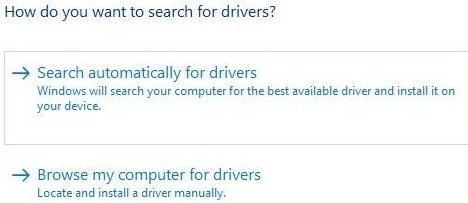
- Wait for a few minutes, then follow the on-screen instructions to complete the installation process.
After installing the latest camera drivers in your system, Restart your computer and check if the Google Meet camera not working problem is fixed. Moreover, if you want an easy way out, you should go for the automated process mentioned below.
Also see: Logitech C920 Webcam Not Working on Windows 11/10 [Solved]
Resolve the Google Meet Camera Not Working Issue By Updating Drivers Automatically
In the automatic process, you need to download the best driver updater software available in the market like the Bit Driver Updater. This program helps you manage all your drivers. Additionally, it comes with various features to enhance your computer’s performance as well as to fix errors like the Google Meet camera not working. This application is secure and reliable to use. Only certified drivers will be downloaded to update your Windows drivers. Some other benefits of using this app are:
- Easy-to-use and user-friendly interface
- 24×7 Customer Support
- Takes a backup of old drivers in case you want to roll them back
- Allows you to schedule the process as per your need
- Improves your computer’s processing speed
Now, it’s time to look at some steps that will help you understand how to download, install, and use this app on your Windows device.
- Click Here to download the Bit Driver Updater

- Open the Downloads folder and run the setup file. Then, follow the on-screen instructions to install the app on your PC.
- Launch the app after installing it
- Now, either click on the Scan Drivers button in the middle of the page or on the Scan tab on the left-side panel. This will allow the application to scan your system for all kinds of missing, faulty, corrupted, or outdated drivers.
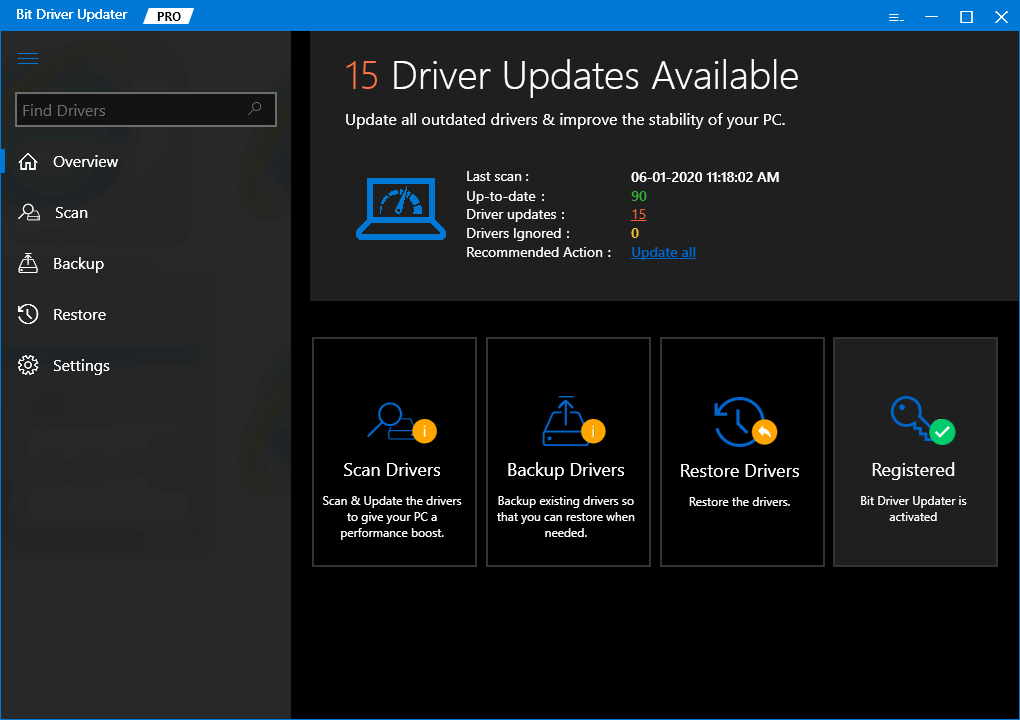
- Then, a list of outdated drivers will be shown to you. Click on the Update all button to update all the drivers at the same time.

Once the process is finished, Restart your computer and it will automatically replace the old drivers with the new ones. This will resolve your Google Meet camera not working issue.
Resolved: Google Meet Camera Failed Issue On Windows
Using the above solutions, you should be able to fix the “camera not working on Google Meet” problem on your Windows devices. But if none of these fixes work, you should check to see if your webcam is working properly. You can do this by using some other video conferencing service.
Share your thoughts about this informative article in the comments box below, we would love to hear from you. Moreover, subscribe to our Free Driver Updater blog to get more tech-related guides like this.
Snehil Masih is a professional technical writer. He is passionate about new & emerging technology and he keeps abreast with the latest technology trends. When not writing, Snehil is likely to be found listening to music, painting, traveling, or simply excavating into his favourite cuisines.


![How to Update and Reinstall Keyboard Drivers on Windows 10/11 [A Guide]](https://wpcontent.totheverge.com/totheverge/wp-content/uploads/2023/06/05062841/How-to-Update-and-Re-install-Keyyboard-Drivers-on-Windows-10.jpg)
