
Is the Lenovo laptop keyboard not working on Windows 10/11? Don’t worry. Here we will show you some effective methods to fix this issue.
Some laptop brands have keyboards that can cause trouble to users frequently. One such brand is Lenovo. Users have often reported that the Lenovo laptop keyboard doesn’t work for them in Windows 10 at times.
If your Lenovo laptop keyboard is not working then you have visited the right article on the search engine because we are going to teach you how to fix this issue with some easy ways.
The Most Recommended Solution for the ‘Lenovo Laptop Keyboard Not Working’ Issue
Faulty and outdated drivers are one of the prominent causes for which the Lenovo keyboard is not working in Windows 10. Therefore, it is advised to update the keyboard drivers for fixing the issue. If you wish to update the drivers automatically, you can use the Bit Driver Updater software. It not only offers one-click driver updates from certified manufacturers but also significantly improves the performance of your computer.

Fix Lenovo Laptop Keyboard Not Working Issue in Windows 10:
If you are stuck with a non-functional keyboard, then let us look at the top seven solutions that can help you deal with the Lenovo laptop keyboard not working issue.
Method 1: Reboot the Windows 10 Computer
Lenovo laptop keyboard not working issue could be fixed simply by restarting your computer. Rebooting the Windows 10 system is often helpful in fixing some simple hardware problems quickly. However, after restarting the computer, if you still see that the Lenovo keyboard is not working then, you can move on to the subsequent fixes described ahead.
Method 2: Tap the Problem Keys Diagonally
This is another simple trick that could get your Lenovo keyboard working if there are some specific keys that are not working. All you have to do is hit the trouble making keys diagonally (lower left point of the keys) for a few seconds. This will unlock the Lenovo laptop keyboard locked due to any other reason.
If the problem of Lenovo laptop keyboard not working in Windows 10 persists, then proceed to the next solution.
Also Read: How to Fix Acer Laptop Keyboard Not Working on Windows 10?
Method 3: Switch Off the Filter Keys
If you have turned off the filter keys mistakenly, ten it could be the reason behind Lenovo laptop keyboard not working issue. You can fix it in the following way:
Step 1: Go to the Control Panel and then to the Ease of Access.
Step 2: Then, click on the Ease of Access Center.

Step 3: After this, you have to choose the “Make the keyboard easier to use” option.
Step 4: Finally, you will have to untick the option “Turn on Filter Keys” located under the “Make it easier to type” section.
Step 5: Press the Apply and OK button to confirm and save the modifications made.
Method 4: Replug the Power Cable
You can try to resolve the issue of Lenovo laptop keyboard not working in Windows 10 by removing the battery and the power cable from the Lenovo laptop and then replugging the power cable and reconnecting the battery. This will help you unlock the Lenovo laptop keyboard locked due to any temporary reason.
You have to first turn off the Windows 10 Lenovo laptop and then remove the battery and the power cable. Hold and press the power button for 60 seconds.
After this, reconnect the battery and replug the power cable. Reboot the computer after this and see if the issue is resolved.
Also Read: Dell Laptop Keyboard Not Working? Here’s How To Fix It
Method 5: Run the Keyboard Troubleshooter
Microsoft Windows operating systems come with a bunch of troubleshooters to help you find and fix problems with your PC. So, if your Lenovo laptop keyboard has stopped working, you can try running the keyboard troubleshooter to solve the Lenovo keyboard manager problem. Here are the steps you need to perform for doing so.
- On your keyboard, press the Windows logo and I keys together to open the Windows Settings app on your PC.
- Find the Update & Security option and click on it.

- Select the Troubleshoot option from the left navigation panel.
- Look for the Keyboard option in the right section and click on it.
- Next, click on the Run the troubleshooter.

- Restart your computer after the keyboard troubleshooting process ends.
After rebooting, your Lenovo laptop keyboard should start working again. However, if the problem persists, move on to the next solution.
Method 6: Uninstall Multiple Keyboards
Having two or more keyboards installed on a single device could be the reason why you’re facing the Lenovo keyboard not working problem in Windows 10. In this situation, you can try to uninstall the external keyboard device from your computer and check if that helps resolve the problem. Below are the steps to do it.
- Open Device Manager on your computer.
- Expand the Keyboards section in the Device Manager.
- Right-click on the keyboard you want to remove and select the Uninstall device option from the pop-up menu.

After the uninstallation process is finished, restart your device and check whether the keyboard not working on the Lenovo laptop problem is resolved or not.
Also Read: Mouse Right Click Not Working Windows 10? Here’s How to Fix It
Method 7: Reinstall Synaptics Driver
If the Lenovo laptop keyboard not working problem still persists then you can try to uninstall and reinstall the Synaptic Driver in order to fix it.
Step 1: Launch the Device Manager from the Control Panel and locate the Synaptics driver.
Step 2: Right-click on the Synaptics driver and then select the Uninstall option from the context menu.
Step 3: Then, click on “Scan for hardware changes” from Action and let Windows search for and reinstall the Synaptics driver on the laptop.

Step 4: Ensure to restart the Lenovo system again.
Method 8: Check for Windows Updates
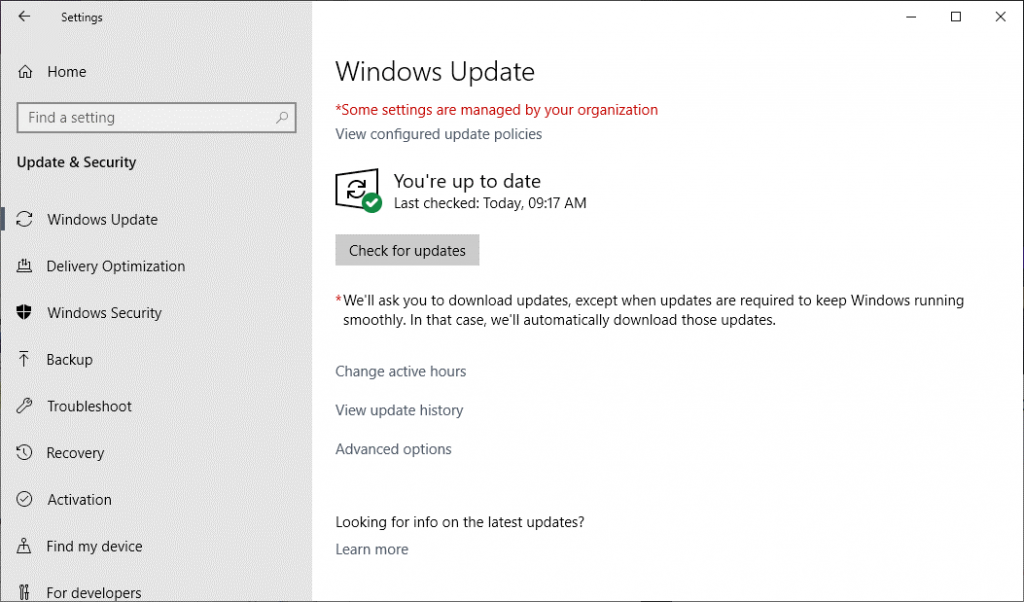
If the Windows 10 system updates have not been installed for a long time now, then it is possible to face some troubles like the Lenovo laptop keyboard not working issue. So, it is recommended that users should regularly install Windows updates and unlock the Lenovo laptop keyboard locked. You can do it in the following way:
Step 1: Navigate to the Lenovo laptop’s Settings app.
Step 2: Go to the Update & Security section.
Step 3: Then, click on the Check for Updates button on the main screen and let Windows search for the latest updates and install them on your PC.
Method 9: Update the Lenovo Keyboard Driver
If your problem of the Lenovo laptop keyboard not working hasn’t been resolved yet, then this method to update the Lenovo keyboard driver Windows 10/11 will surely work for you. To make the Lenovo keyboard functional again, all that you are require to do is update your outdated and corrupt keyboard drivers to the newly released driver versions. There are two options available to do so: manual and automatic.
A) Update Lenovo Keyboard Driver Manually
You can manually download and install the latest keyboard drivers for your Lenovo laptop by using the Windows built-in utility called Device Manager. Here are the required steps.
- Type device manager in the search box and then select the same from the menu.

- Expand the ‘Keyboards’ category. Locate and right-click on the keyboard device and select the ‘Update Driver’ option from the context menu.
- Next, click on the ‘Search automatically for updated driver software’ option.
- Now, wait for the Windows operating system to find and install the latest driver version on your computer.
B) Update Lenovo Keyboard Driver Automatically
It’s common knowledge that the manual process to update Lenovo keyboard driver Windows 10/11 is quite tedious and requires a lot of patience and time. Therefore, we have got a quick and simple solution for you. You can simply install Bit Driver Updater on your Lenovo laptop and leave the rest to it. Here’s how to use this amazing program to update the keyboard and all other hardware drivers on Windows PC.
- Download Bit Driver Updater by clicking on the button provided below.
- Start the driver scanning process by clicking on the Scan Drivers option available on the home screen of the application.

- Select your keyboard device from the scanning results and then click the Update Now button located next to it.
Method 10: Perform System Restore
Don’t panic, if the above tactics to update the Lenovo keyboard driver windows 10/11 worked to fix Lenovo laptop keyboard not working issue, as you still have a last resort. Running system restore might help you get rid of this inconvenience. To do so, you need to follow the simple steps shared below and restore the Lenovo keyboard manager:
- Open Control Panel.
- Make sure to set View By: Small Icon. Then, find System and click on it.

- Locate System Protection on the left and click on the same to proceed.

- Click System Restore in the next window.
- After that, click Next.

- Next, choose the restore point depending on the date and time. Later, click Next.
- Lastly, make a click on Finish to end the process. And, if in case, a prompt appears asking for your confirmation, then click YES to continue.

Once done, restart your system to apply changes. Thereafter, check to see if the Lenovo laptop keyboard not working is resolved. This should definitely get the issue fixed.
Also Read: How to Fix HP Laptop Keyboard Not Working [Solved]
Frequently Asked Questions: Lenovo Keyboard Not Working on Windows 11
If you have any doubts related to the Lenovo laptop keyboard not working errors. Then have a look at the most commonly asked questions for a solution.
Q1.How to uninstall keyboard driver Lenovo?
If you want to uninstall the Lenovo keyboard driver to fix the Lenovo keyboard not working issues, you can take the help of the Device Manager. Run the Device Manager using the Windows search bar. Expand the keyboards category and right-click on the Lenovo keyboard to Uninstall it.
Q2.How do you reset a Lenovo laptop keyboard?
You can reset the Lenovo laptop keyboard by uninstalling and reinstalling the keyboard driver. For this, launch the Device Manager on your system. Look for the keyboard under the keyboard category. Right-click on the keyboard device, and Uninstall its driver. Lastly, restart your laptop to reinstall the driver.
Q3. How do I fix the keys on my Lenovo keyboard not working?
To fix the keys on your Lenovo keyboard not working, you can try restarting the device. If this does not work, then the above are some other solutions that can help you fix the error.
Resolved: Lenovo Laptop Keyboard Not Working Issue
This was all about the ways to fix the Lenovo laptop keyboard not working issue in Windows 10. Feel free to drop your queries, suggestions, or additional fixes for the laptop keyboard not working issue in the comments section below.
Snehil Masih is a professional technical writer. He is passionate about new & emerging technology and he keeps abreast with the latest technology trends. When not writing, Snehil is likely to be found listening to music, painting, traveling, or simply excavating into his favourite cuisines.


![How to Update and Reinstall Keyboard Drivers on Windows 10/11 [A Guide]](https://wpcontent.totheverge.com/totheverge/wp-content/uploads/2023/06/05062841/How-to-Update-and-Re-install-Keyyboard-Drivers-on-Windows-10.jpg)
