
![How to Fix SteelSeries Arctis 7 Mic Not Working [SOLVED]](https://wpcontent.totheverge.com/totheverge/wp-content/uploads/2023/02/18115238/How-to-Fix-SteelSeries-Arctis-7-Mic-Not-Working-SOLVED.jpg)
The SteelSeries Arctis 7 is a popular gaming headset that is known for its great audio quality and comfortable fit.
However, some users may experience issues with the microphone not working properly. In this blog post, we will provide step-by-step instructions on how to fix the SteelSeries Arctis 7 mic not working issue. So, let’s get started!
Effective Fixes for SteelSeries Arctis 7 Mic Not Working Error
Below are some easy and quick solutions you may try for your SteelSeries mic not working problem on your Windows system.
Solution 1: Check for the hardware faults
The first thing to check when experiencing Steelseries Arctis 7 mic not working issue is the hardware connections.
Ensure that the headset is properly connected to your computer or gaming console and that the microphone is properly plugged into the headset. If you are using a wireless connection, ensure that the headset is properly paired to your computer or gaming console.
Solution 2: Reset your headset to fix Arctis 7 mic not working
Another fix for Steelseries Arctis 7 mic not working error is to perform a hardware reset on the headset. This will enable you to resolve your device’s issue easily.
To do so, follow the below steps.
- Simply locate the pinhole on the left earcup cushion.
- Then push that reset button for around a second with a pin or a paper clip. This will reset the hardware.
After doing this, you may check for your SteelSeries mic not working problem is fixed. If the issue still persists, read on to find other solutions.
Also read: Beats Audio Driver Download, Install and Update for Windows 10,11,8, 7
Solution 3: Check microphone settings
After connecting the SteelSeries Arctis 7 headset microphone to your PC, you must properly configure its settings. If not, it might show you Steelseries Arctis 7 mic not working error. To configure everything correctly, adhere to the steps listed below.
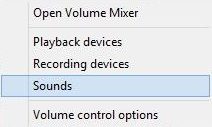
- Right-click on the volume icon in the system tray and select Sounds from the context menu.
- Select the Recording tab. Now, right-click anywhere on the screen and select the Show Disabled Devices option.
- Verify that the SteelSeries Arctis 7 headset microphone is turned on. If it is not, then right-click on it and select Enable from the context menu.
- Then, again right-click on your microphone and select Properties.
- Choose the Levels tab. There, ensure that the microphone volume is turned up and that the microphone is not muted.
This should solve the Arctis 7 microphone not working issue. If not, read ahead to know more fixes.
Solution 4: Set your microphone as Default
If the microphone is not set as the default device, you may face Steelseries Arctis 7 mic not working error on your system. To set your microphone as the default device, follow these steps:
- Type Control Panel into the search bar.
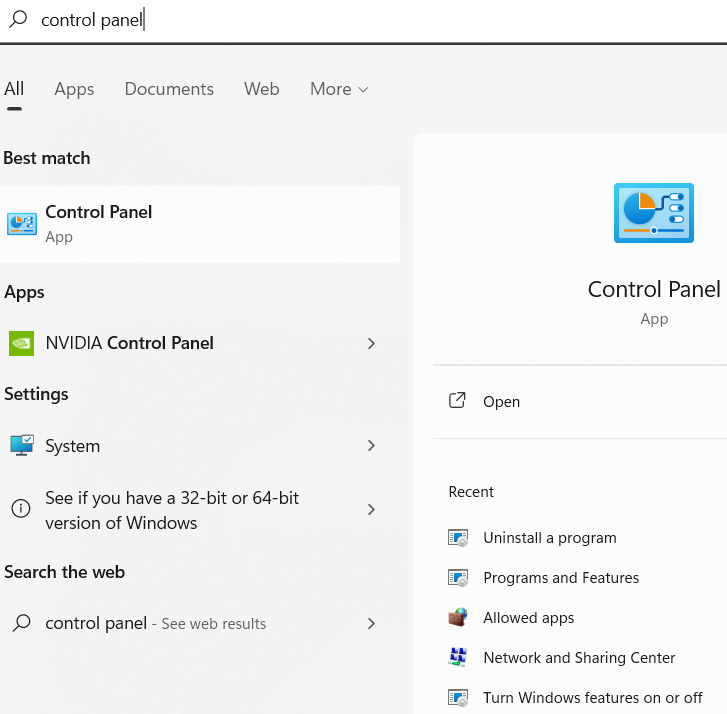
- Then, in the Control Panel, select the Sound icon.
- Select the Recording tab. Right-click on your microphone and select Set as Default Device.
Now, check if the Arctis 7 mic not working issue is solved. If the issue still persists, read on to find other solutions.
Solution 5: Update the audio drivers for the SteelSeries mic not working error
If you are using the incorrect audio driver or if it is outdated, then the SteelSeries Arctis 7 mic not working issue will undoubtedly happen.
To ensure that the audio devices are functioning properly, it is preferable to keep the audio drivers updated with their latest version. Therefore, you may install the most recent audio drivers from the SteelSeries official website on your system.
Also, to update your audio drivers manually you may follow the below steps:
- Press the Windows key + X and select Device Manager from the context menu.
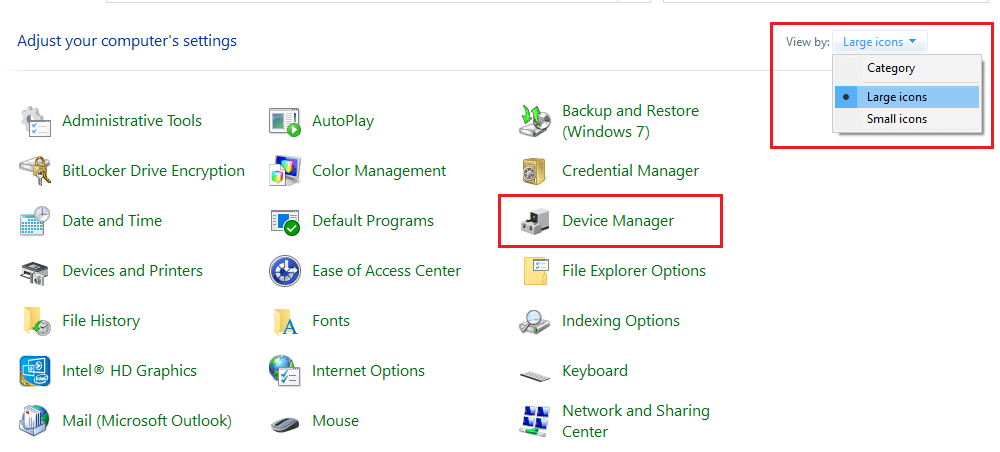
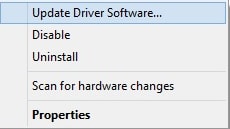
- Expand the Audio inputs and outputs option. Right-click on your audio device and select Update Driver Software.
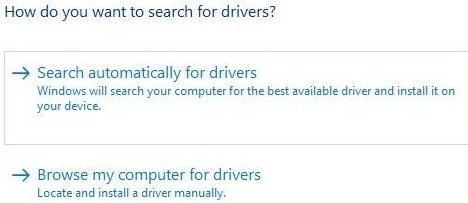
- Select Search automatically for updated drivers and follow the prompts to finish the installation.
However, we recommend you go with the simpler solution to download the microphone driver. Read ahead to find some easy steps in order to automate the whole process of updating your system drivers manually.
The recommended method for fixing SteelSeries mic not working error
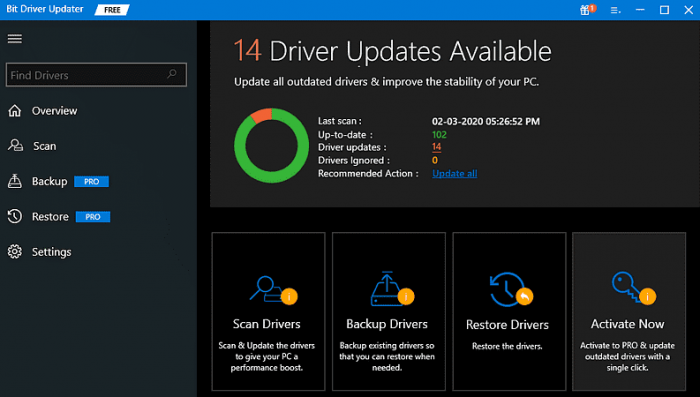
For this method, you may need to download and install any of the best automatic tools that can assist you in updating your drivers with a single click. From the wide range of tools, we suggest you use the Bit Driver Updater. It is one of the safest and most secure third-party tools.
It can repair all of your driver-related problems including corrupted, missing, or outdated drivers automatically. Moreover, it offers you an amazing feature of scheduling your driver updates according to your convenience.
Hence, you may also fix the SteelSeries Arctis 7 mic not working issue easily with the help of this automatic updater tool. To do so, follow the steps given below.
- Download the Bit Driver Updater app through the download link below. Follow the prompts displayed to install it successfully.

- Then, start the program and choose the Scan Drivers option. Let the scanning process happen.
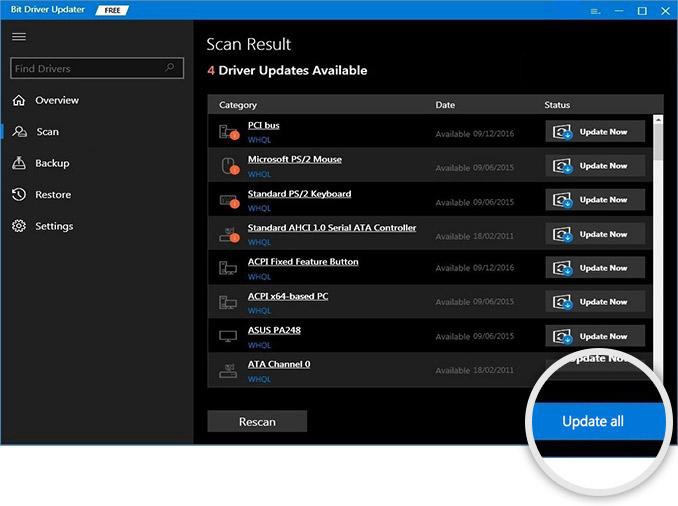
- Now, choose the Update Now option next to your desired audio driver or choose the Update All option to update all the system drivers simultaneously.
Restart your computer after the update procedure is complete. After rebooting, your Windows will start using the updated drivers, and your microphone not working issue will be fixed.
Solution 6: Reinstall your SteelSeries Engine Software
You must download and install the most recent version of the SteelSeries Engine application in order to optimize the SteelSeries Arctis 7 microphone. To utilize this fantastic headset to its best potential, you must properly configure this program.
The out-of-date version of this app may result in the Steelseries Arctis 7 mic not working error. Hence, you may uninstall the SteelSeries Engine software and reinstall it in order to fix this issue handily. To perform it correctly, adhere to the steps given below.
- To open the Run command, simultaneously hit the Windows key and R on your keyboard. Next, enter appwiz.cpl in it and press OK.
- Now, right-click on your SteelSeries Engine tool and then click Uninstall from the context menu.
- Then, visit the official SteelSeries website. To get the most recent SteelSeries Engine, select Windows. To install the SteelSeries Engine software, adhere to the on-display instructions.
- Open the SteelSeries Engine, then unplug and replug the Arctis 7 mic from your computer.
- Click on the displayed device name once the engine has identified your headset. The device configurations will then open. Select the Live Mic Preview option.
Choose your preferred settings, then minimize the application. Now, check if the SteelSeries Arctis 7 mic not working discord error is solved.
Fixed: SteelSeries Arctis 7 Microphone Not Working Problem on Windows
In conclusion, the SteelSeries Arctis 7 mic not working issue can be frustrating, but it is usually easy to fix. Follow all the aforementioned methods and steps in the correct order to ensure that the microphone is properly connected and your issue is solved effectively. If none of the above steps work, it may be a hardware issue with the SteelSeries Arctis 7. Contact SteelSeries support for additional support.
If this blog was useful in resolving the problem, you may subscribe to our blog for more such tech-related and problem-solving articles. If you have some suggestions or queries, feel free to ask them in the comment section below. Follow us on Twitter, Facebook, Instagram, and Pinterest to never miss an update.
Snehil Masih is a professional technical writer. He is passionate about new & emerging technology and he keeps abreast with the latest technology trends. When not writing, Snehil is likely to be found listening to music, painting, traveling, or simply excavating into his favourite cuisines.


![How to Update and Reinstall Keyboard Drivers on Windows 10/11 [A Guide]](https://wpcontent.totheverge.com/totheverge/wp-content/uploads/2023/06/05062841/How-to-Update-and-Re-install-Keyyboard-Drivers-on-Windows-10.jpg)
