
If you are experiencing the Local print spooler service is not running errors on your Windows devices, you are not alone. Many Windows users have lately come across similar printer spooler errors. But all these errors are thankfully fixable. Read the complete tutorial to find the best possible solutions that can resolve the error on your Windows device and help you overcome the print spooler not running problem.
How do I Fix the Print Spooler Service is Not Running in Windows 10, 11, 8, or 7?
It can be complicated to identify the actual reason behind the printing spooler not running. The only way to fix local print spooler service not running Windows 7, 8, 10, or 11 is by typing out the fixes below.
Method 1: Restart the service of Print Spooler
The first thing to be done while facing the issue local print spooler service is not working on your Windows PC should be to restart the service. Below are the steps to be performed for the same
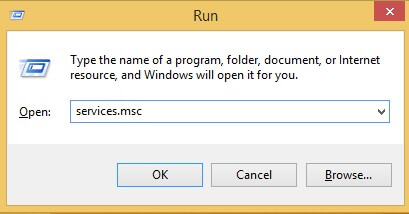
1: Open the Run dialog box using Windows & R keys. Enter services.msc and click on OK.
2: Locate and click on Print Spooler from the list of services. Click on Restart the Service option.
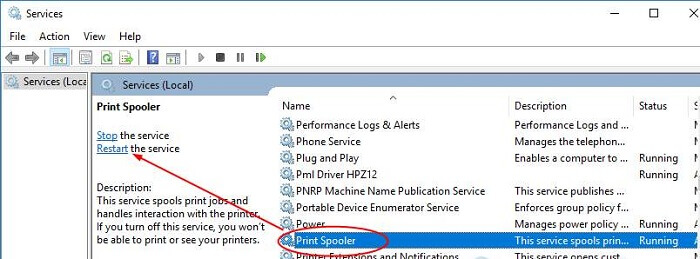
Now check if the printer spooler error local print spooler service is not working is fixed. If the error remains, proceed with the following set of solutions.
Also Know: How To Fix HP Printer Not Connecting To Wifi Network Error For Windows PC
Method 2: Set Print Spooler Service to Automatic
The local print spooler service is not running error can come up when the service is not set to Automatic. To set the print spooler service to automatic apply the following steps
1: Open the Run dialog box (Windows +R keys). Write services.msc and press the enter key on your keyboard.
2: Locate Print Spooler and right click on it. Select Properties.
3: In the Print Spooler Properties window move to the General tab.
4: Check if the Startup type is set to Automatic. Set it to Automatic from the drop down list in case it’s not.
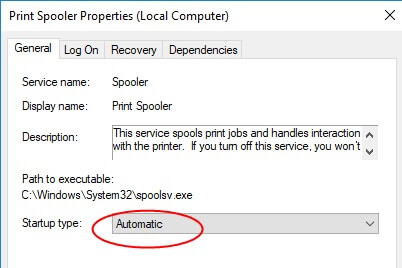
5: Click on Apply then on OK.
Now check if the updated settings could fix the print spooler service not running. If still the Print spooler not automatically starting try the following fixes to address the problem.
Also Know: How to Update Drivers on Windows 11 [Best and Quick Ways]
Method 3: Update the Options for Print Spooler Recovery
Even after applying the above fixes if still, your device displays the server print spooler service is not running. Please restart the spooler on the server error message the problem can be with the Recovery options.
To update the recovery settings and fix the local print spooler service is not running error
1: Open the Run Dialog box by clicking on Windows and R keys together. Press enter key after writing services.msc.
2: Right click on the Print Spooler and open its Properties.
3: In the Properties window navigate to the Recovery tab and set the following three options to Restart the Service option.
- First Failure
- Second Failure
- Third Failure
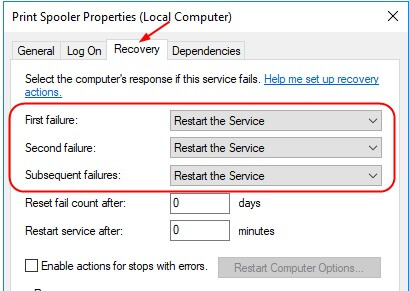
4: Click on Apply followed by the OK button.
Once the Recovery settings are updated check if the local print spooler service is not running error is resolved. If the problem remains, try the next alternative.
Method 4: Remove the Files of Print Spooler
If multiple print jobs are pending on your PC it can hamper the working and cause the printer spooler error. This can further lead to local print spooler service is not running error. This can be fixed by deleting the files and removing pending jobs. Here are the steps to do so.
1: Use Windows and R keys altogether to open Run Dialog box and type services.msc then press the Enter key.
2: In the Services tab from the left panel locate Print Spooler and click on it. Press the Stop the service option.

3: Minimize the window. Again click on Windows and E keys together and in the address bar move to the following destination and click on Continue in case asked to grant the permission.
C:\Windows\System32\spool\PRINTERS:
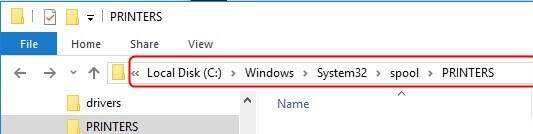
4: Select all the files in the Printers folder and Delete them.
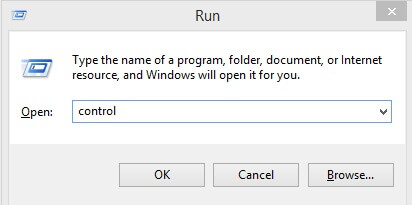
5: Again, invoke the Run dialog box using Windows + R keys. Type control and press Enter key.
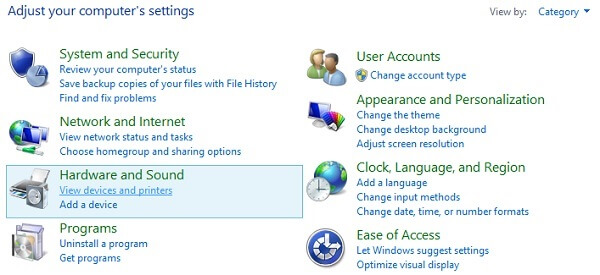
6: In the Control Panel select the Category option in the View by drop-down list. Select and Expand View devices & Printers.
7: Click right on the Printer device and select the option Remove Device.
8: Now open the Service window you minimized in the third step and start the Print spooler service again.
9: In Printers right click on blank space and click on option Add a Printer. Using the instructions on your screen reinstall the printer.
Now check if the above steps to reinstall print spooler service Windows 10, 11, 8, or 7 could fix the error. If the local print spooler service is not running Windows 8, 7, 10, or 11 issues persist, move to the next fix.
Also Know: How to Fix Common Driver Problems in Windows 11,10, 8, 7
Method 5: Update Printer Driver
If the above fixes didn’t help, it’s time for you to check for pending updates on the printer driver. Outdated or incompatible printer drivers can lead to the error local print spooler service is not running. You can update the drivers manually from the website or through an automatic driver updater tool. The manual update requires technical knowledge, basic skills, and enough patience to search for compatible drivers and download them.
But using an automatic driver updater tool i.e Bit Driver Updater can make updating drivers an easy task. You can not only update drivers through this tool but can restore & backup data of system drivers, schedule driver updates, download certified drivers, and improve the speed of your PC. Here is how to use the Bit Driver Updater to fix the local print spooler service is not running Windows 10, 11, or older version device error.
1: Download the Bit Driver Updater tool and install it by following the instructions displayed.

2: Click on the tool to open and select Scan Drivers option to begin the process of searching for outdated drivers.
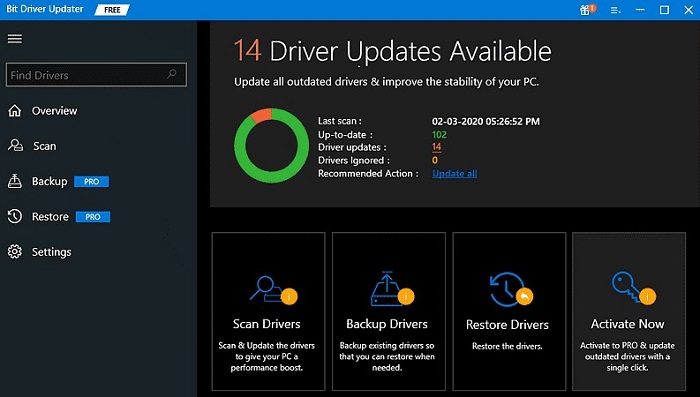
3: Wait till the scan completes, a list of drivers with pending updates is displayed.
4: Scroll down the list and search for the Printer driver. Click on Update button next to it to begin the download for latest printer drivers.
5: You can download all the drivers manually using the adjacent Update Now button or switch to Pro version of the tool and use Update All option to download all the driver updates at once.

6: Install the Printer driver using the instructions that follow and Restart your Windows PC or laptop to apply the updates.
That’s it automatic driver updates are this smooth when you switch to the Bit Driver Updater. If you want to unlock the complete functionality of the software download the Pro version with a 60-day money back guarantee in case the performance of the tool is unsatisfactory.
Once the updated Printer drivers are in action, check if the local printer spooler service is not running error is fixed.
Local Print Spooler Service Is Not Running in Windows 11, 10, 8, or 7: FIXED
That’s it. Hopefully, the above fixes helped you resolve the issue of the ‘local print spooler service is not running’ on your Windows device. Keep applying the fixes starting from top to bottom until the issue is fixed. Make sure the printer driver installed on your device is up to date. Use the Bit Driver Updater to automatically update the printer and other drivers on your Windows device.
We hope the guide helped you with your concerns about the spooler service error. Feel free to reach out to us in the comments if you need any further guidance on the same. Sign up to subscribe to our blog and stay updated with regular technology updates. Follow us on our social media platforms Facebook, Instagram, Twitter, and Pinterest for tech related tips and tricks.
Snehil Masih is a professional technical writer. He is passionate about new & emerging technology and he keeps abreast with the latest technology trends. When not writing, Snehil is likely to be found listening to music, painting, traveling, or simply excavating into his favourite cuisines.


![How to Update and Reinstall Keyboard Drivers on Windows 10/11 [A Guide]](https://wpcontent.totheverge.com/totheverge/wp-content/uploads/2023/06/05062841/How-to-Update-and-Re-install-Keyyboard-Drivers-on-Windows-10.jpg)
